Side Projects - 3D Printed Reel
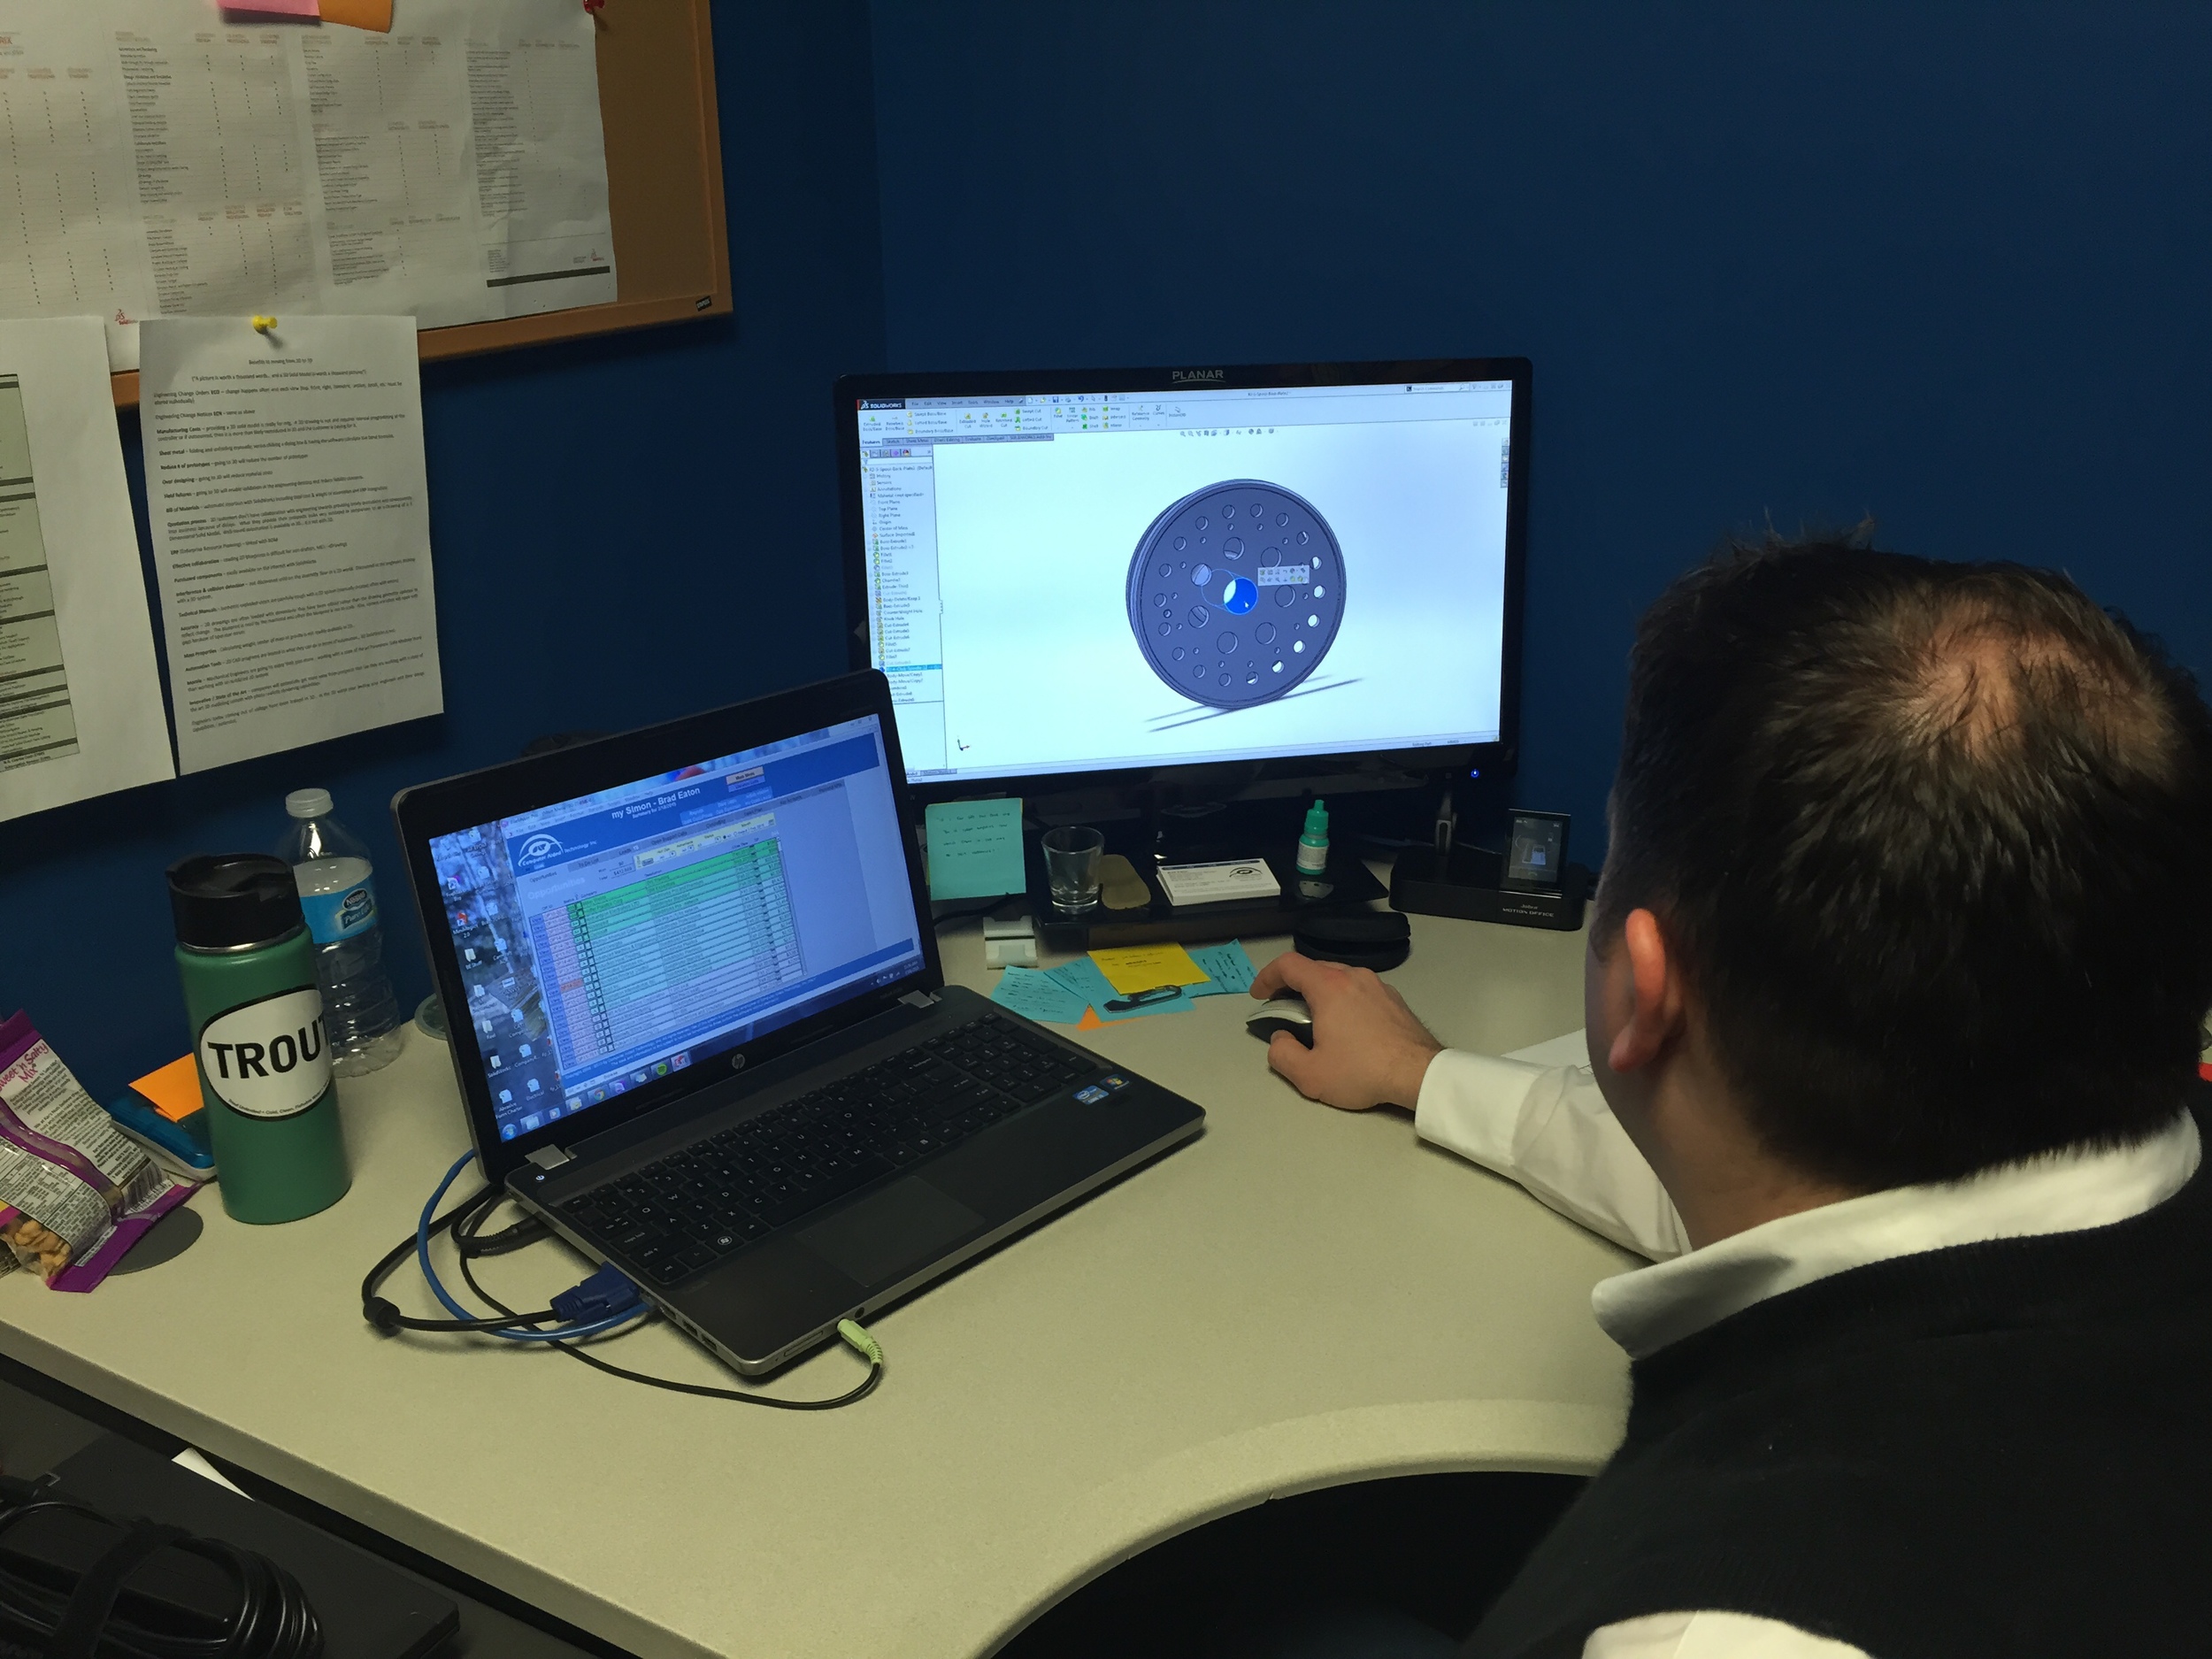
So if you've been following us here at T&T for any length of time, you've surely realized I work for an organization that partners with manufacturing companies and we sell software and hardware that allows them to save time and money developing and producing their products. These boil down to a CAD (computer aided design) tool named SolidWorks, and 3D printers under the Stratasys brand.
If you ask my wife, she'd tell you I'm always trying to think of my next "project". Whether it be another rod to build, blog to start, few dozen flies to tie, I've always got my fingers doing something, and lately it seems the projects are starting to escalate. Now they're things like a tear drop trailer, truck top tent, starting a production company - not really small projects, and in reality, mostly pipe dreams. But one that always stays close to the top is designing and printing my own fly reels.
Seeing so many amazing designs in places like The Classic Fly Rod Forums - Rod and Reel Makers Forum, I wanted to be able to take what I was doing on a daily basis for my job, and roll it in to making my own versions of what I was seeing online. So I set out to figuring out how to craft my design and started working on learning SolidWorks. This is where things came to an abrupt halt. Finding the time to teach yourself a tool that, though easy to use, requires dedication and I just couldn't find the time to break away from my job to attend one of our training classes. Enter Michael Hackney and the Eclectic Angler.

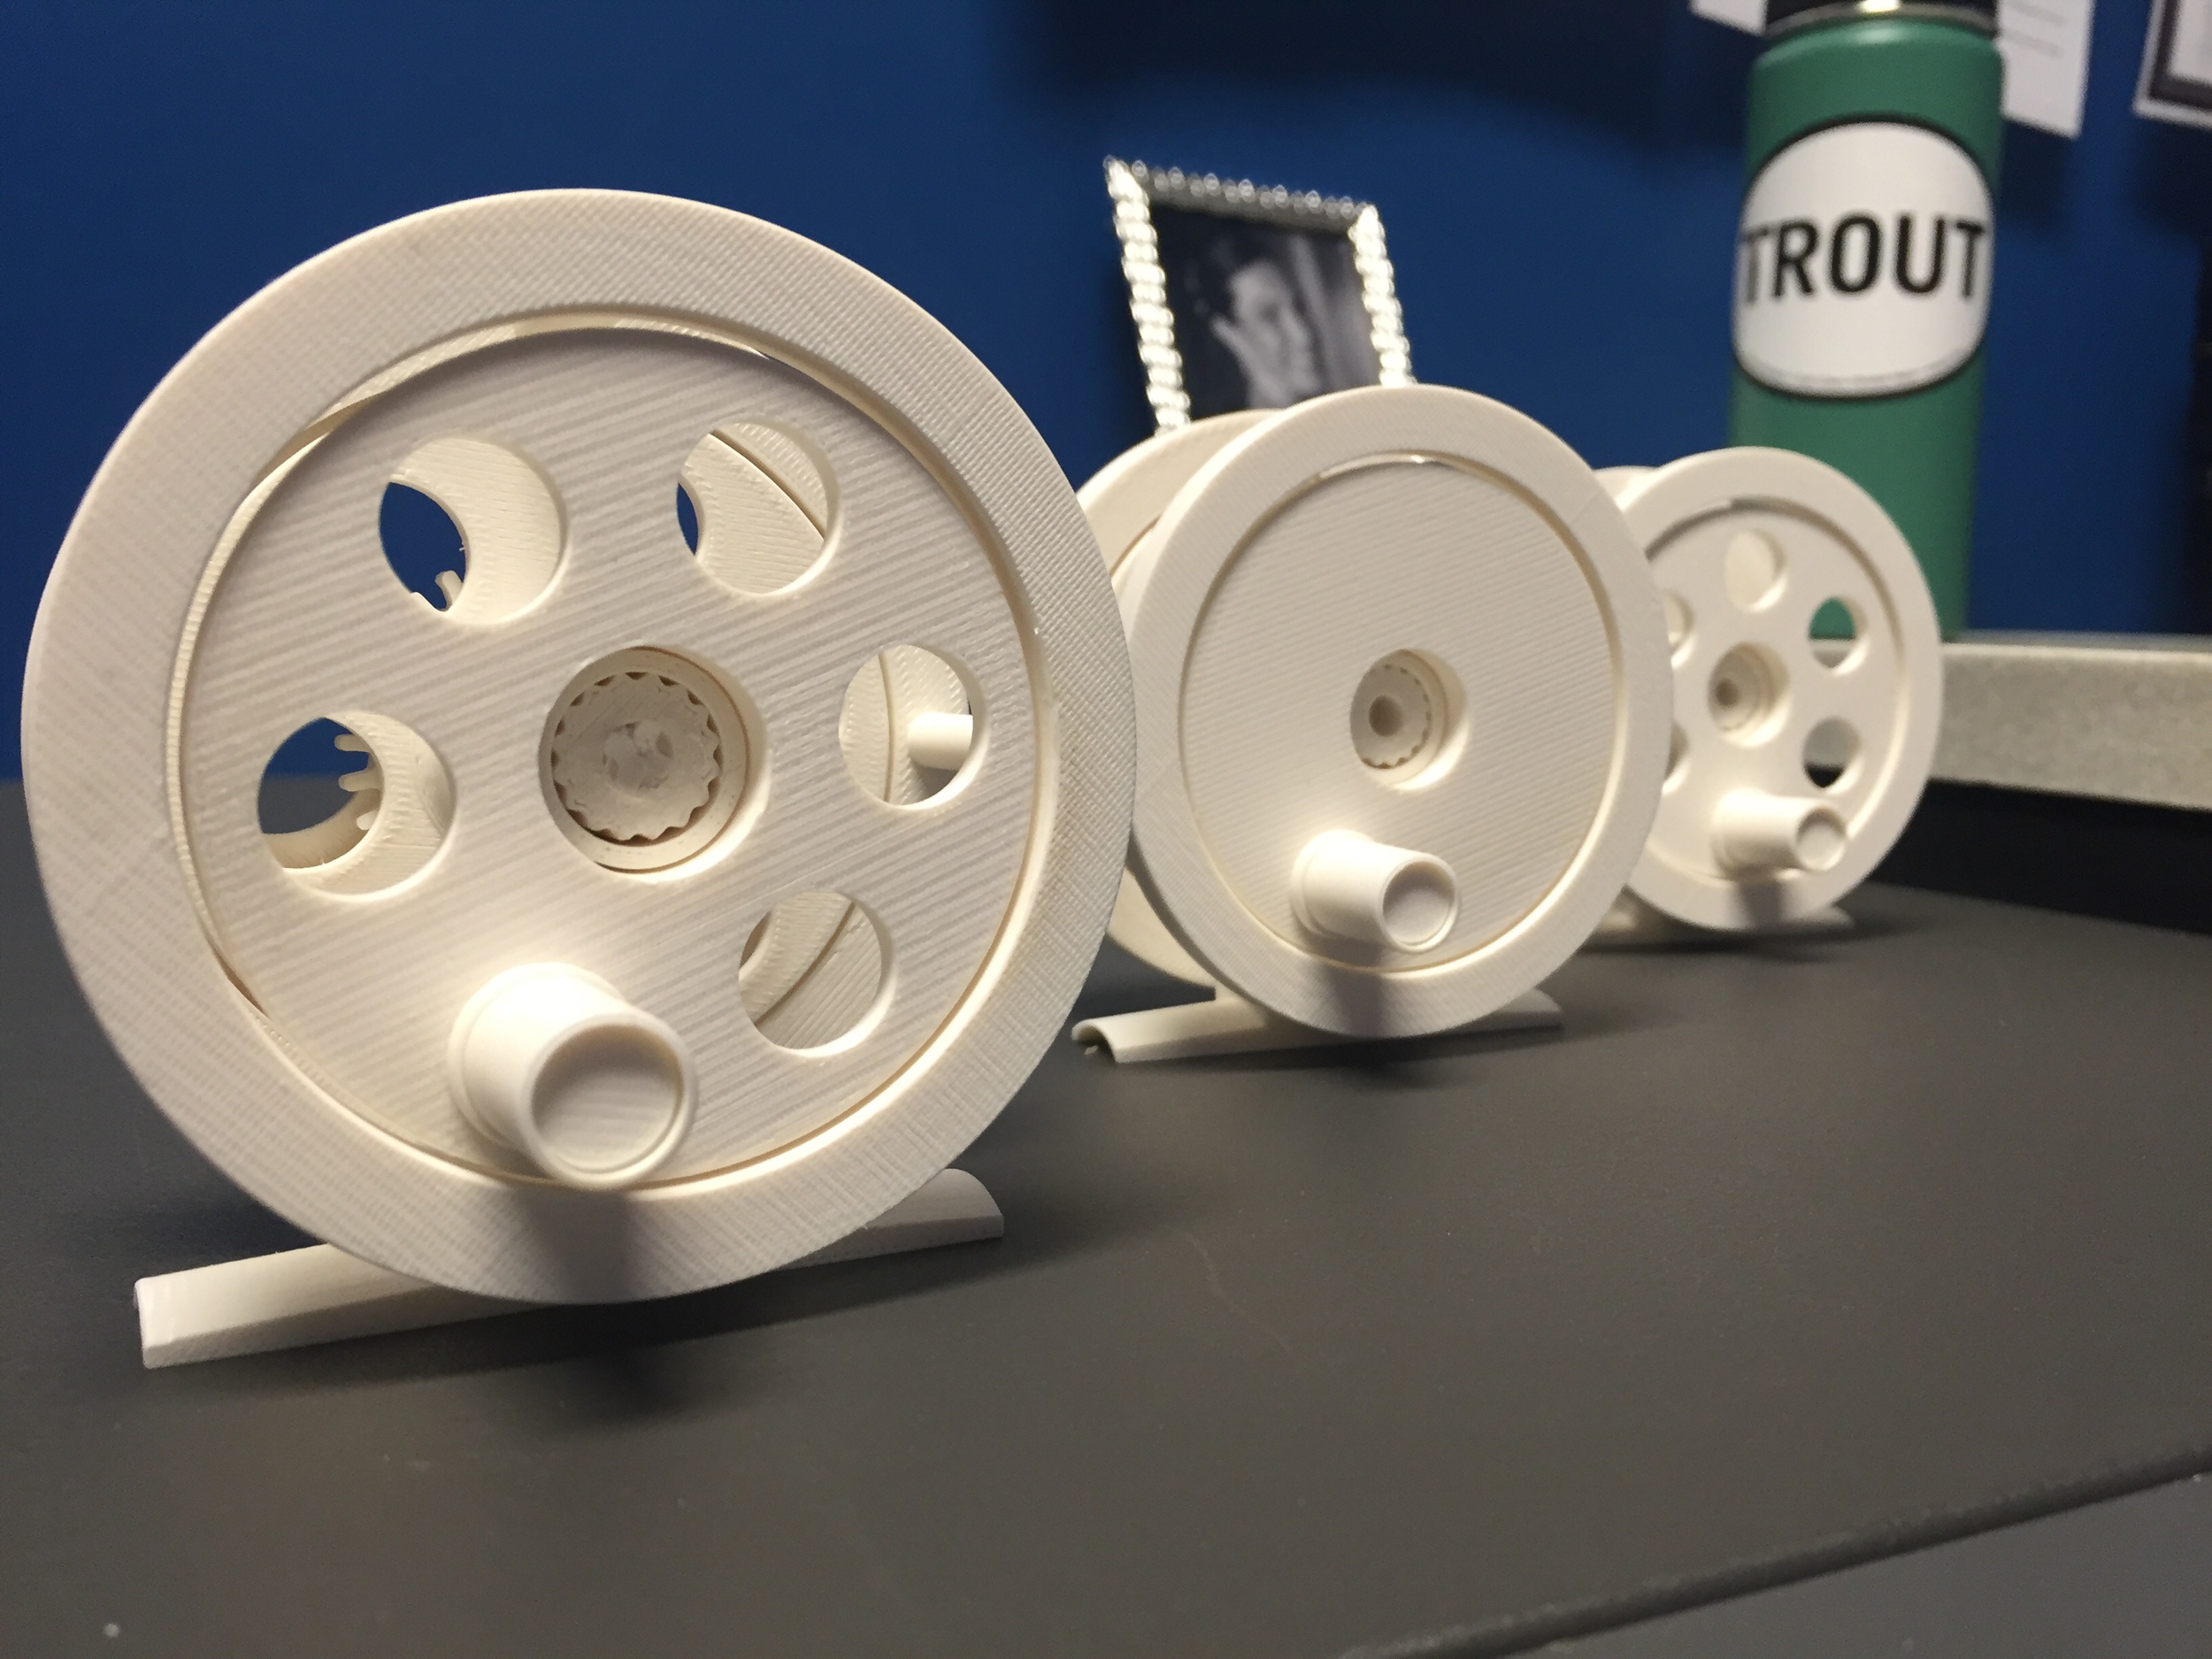
Michael worked for a year before he perfected a reel that was easy to print, cost effective (read inexpensive to produce), and had a great look to it. We traded emails back and forth a while back but again, my inability to focus on the task at hand, made this project falter. With some exposure from the likes of Field and Stream, I realized that Michael had made the files available for download, giving me the perfect starting point. All the work Michael did perfecting the design and getting the components just right, led to a great little click pawl reel.
You can learn more about Mike and his reels by visiting the Eclectic Angler.

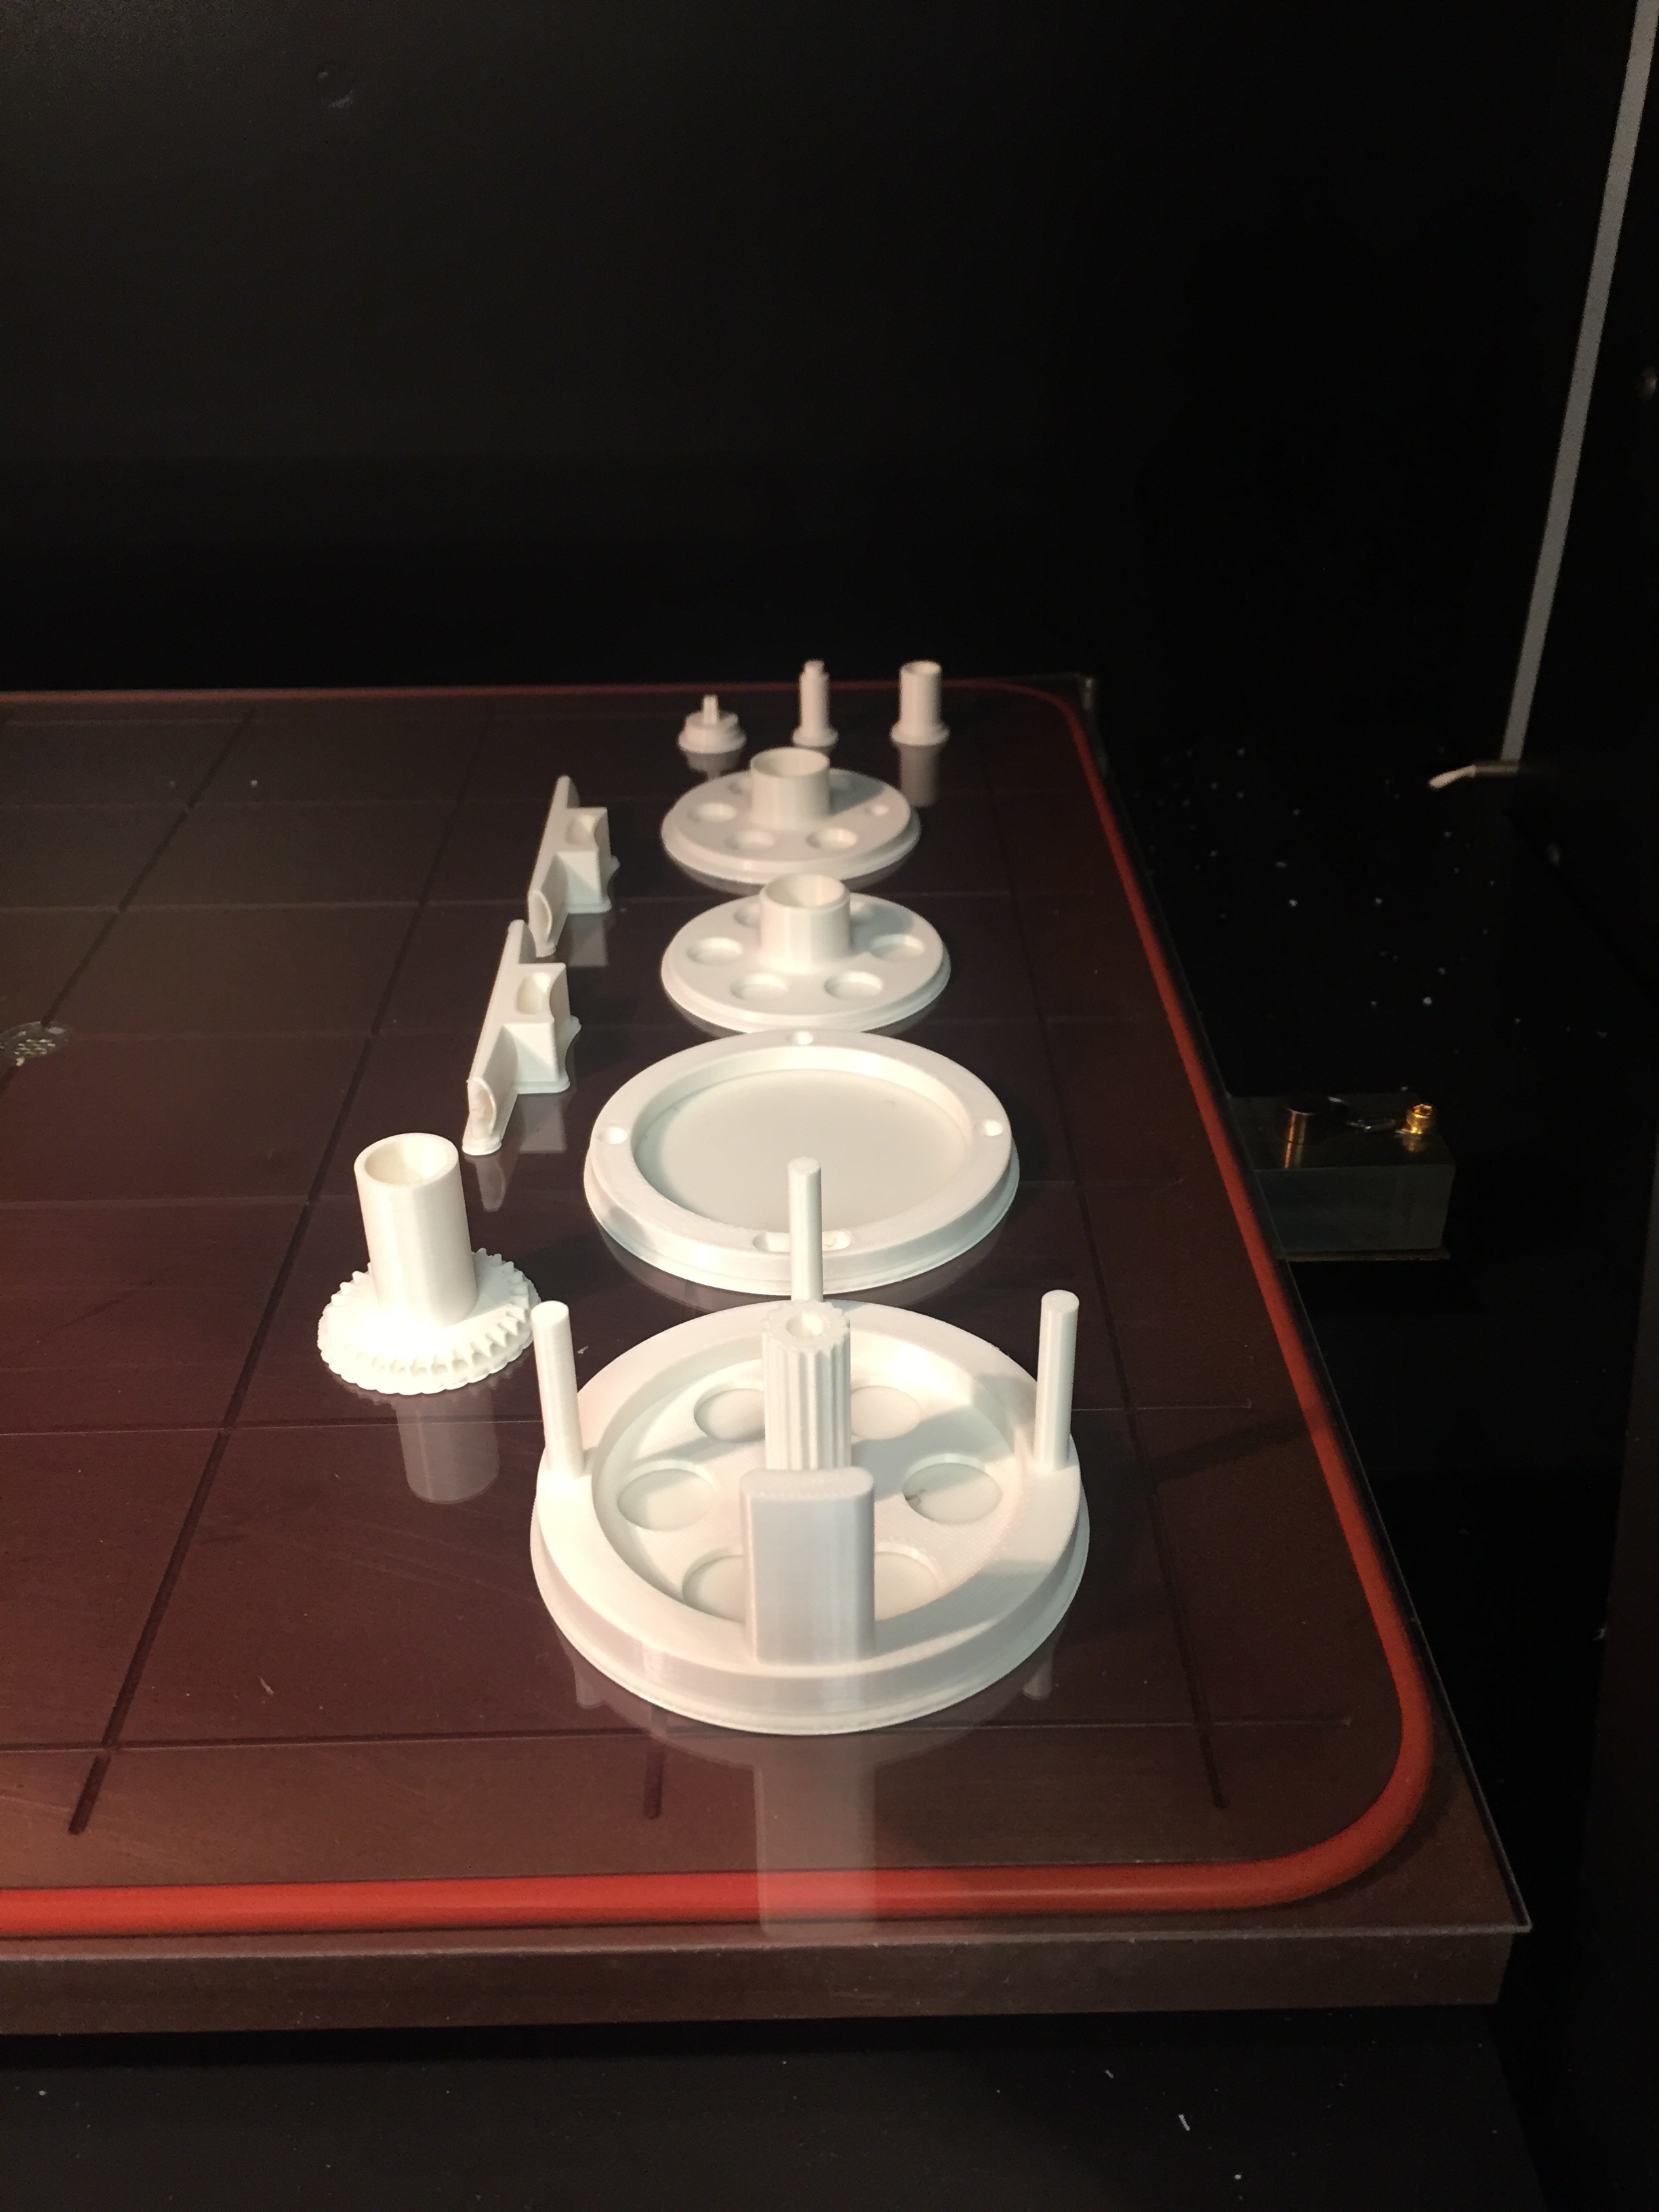
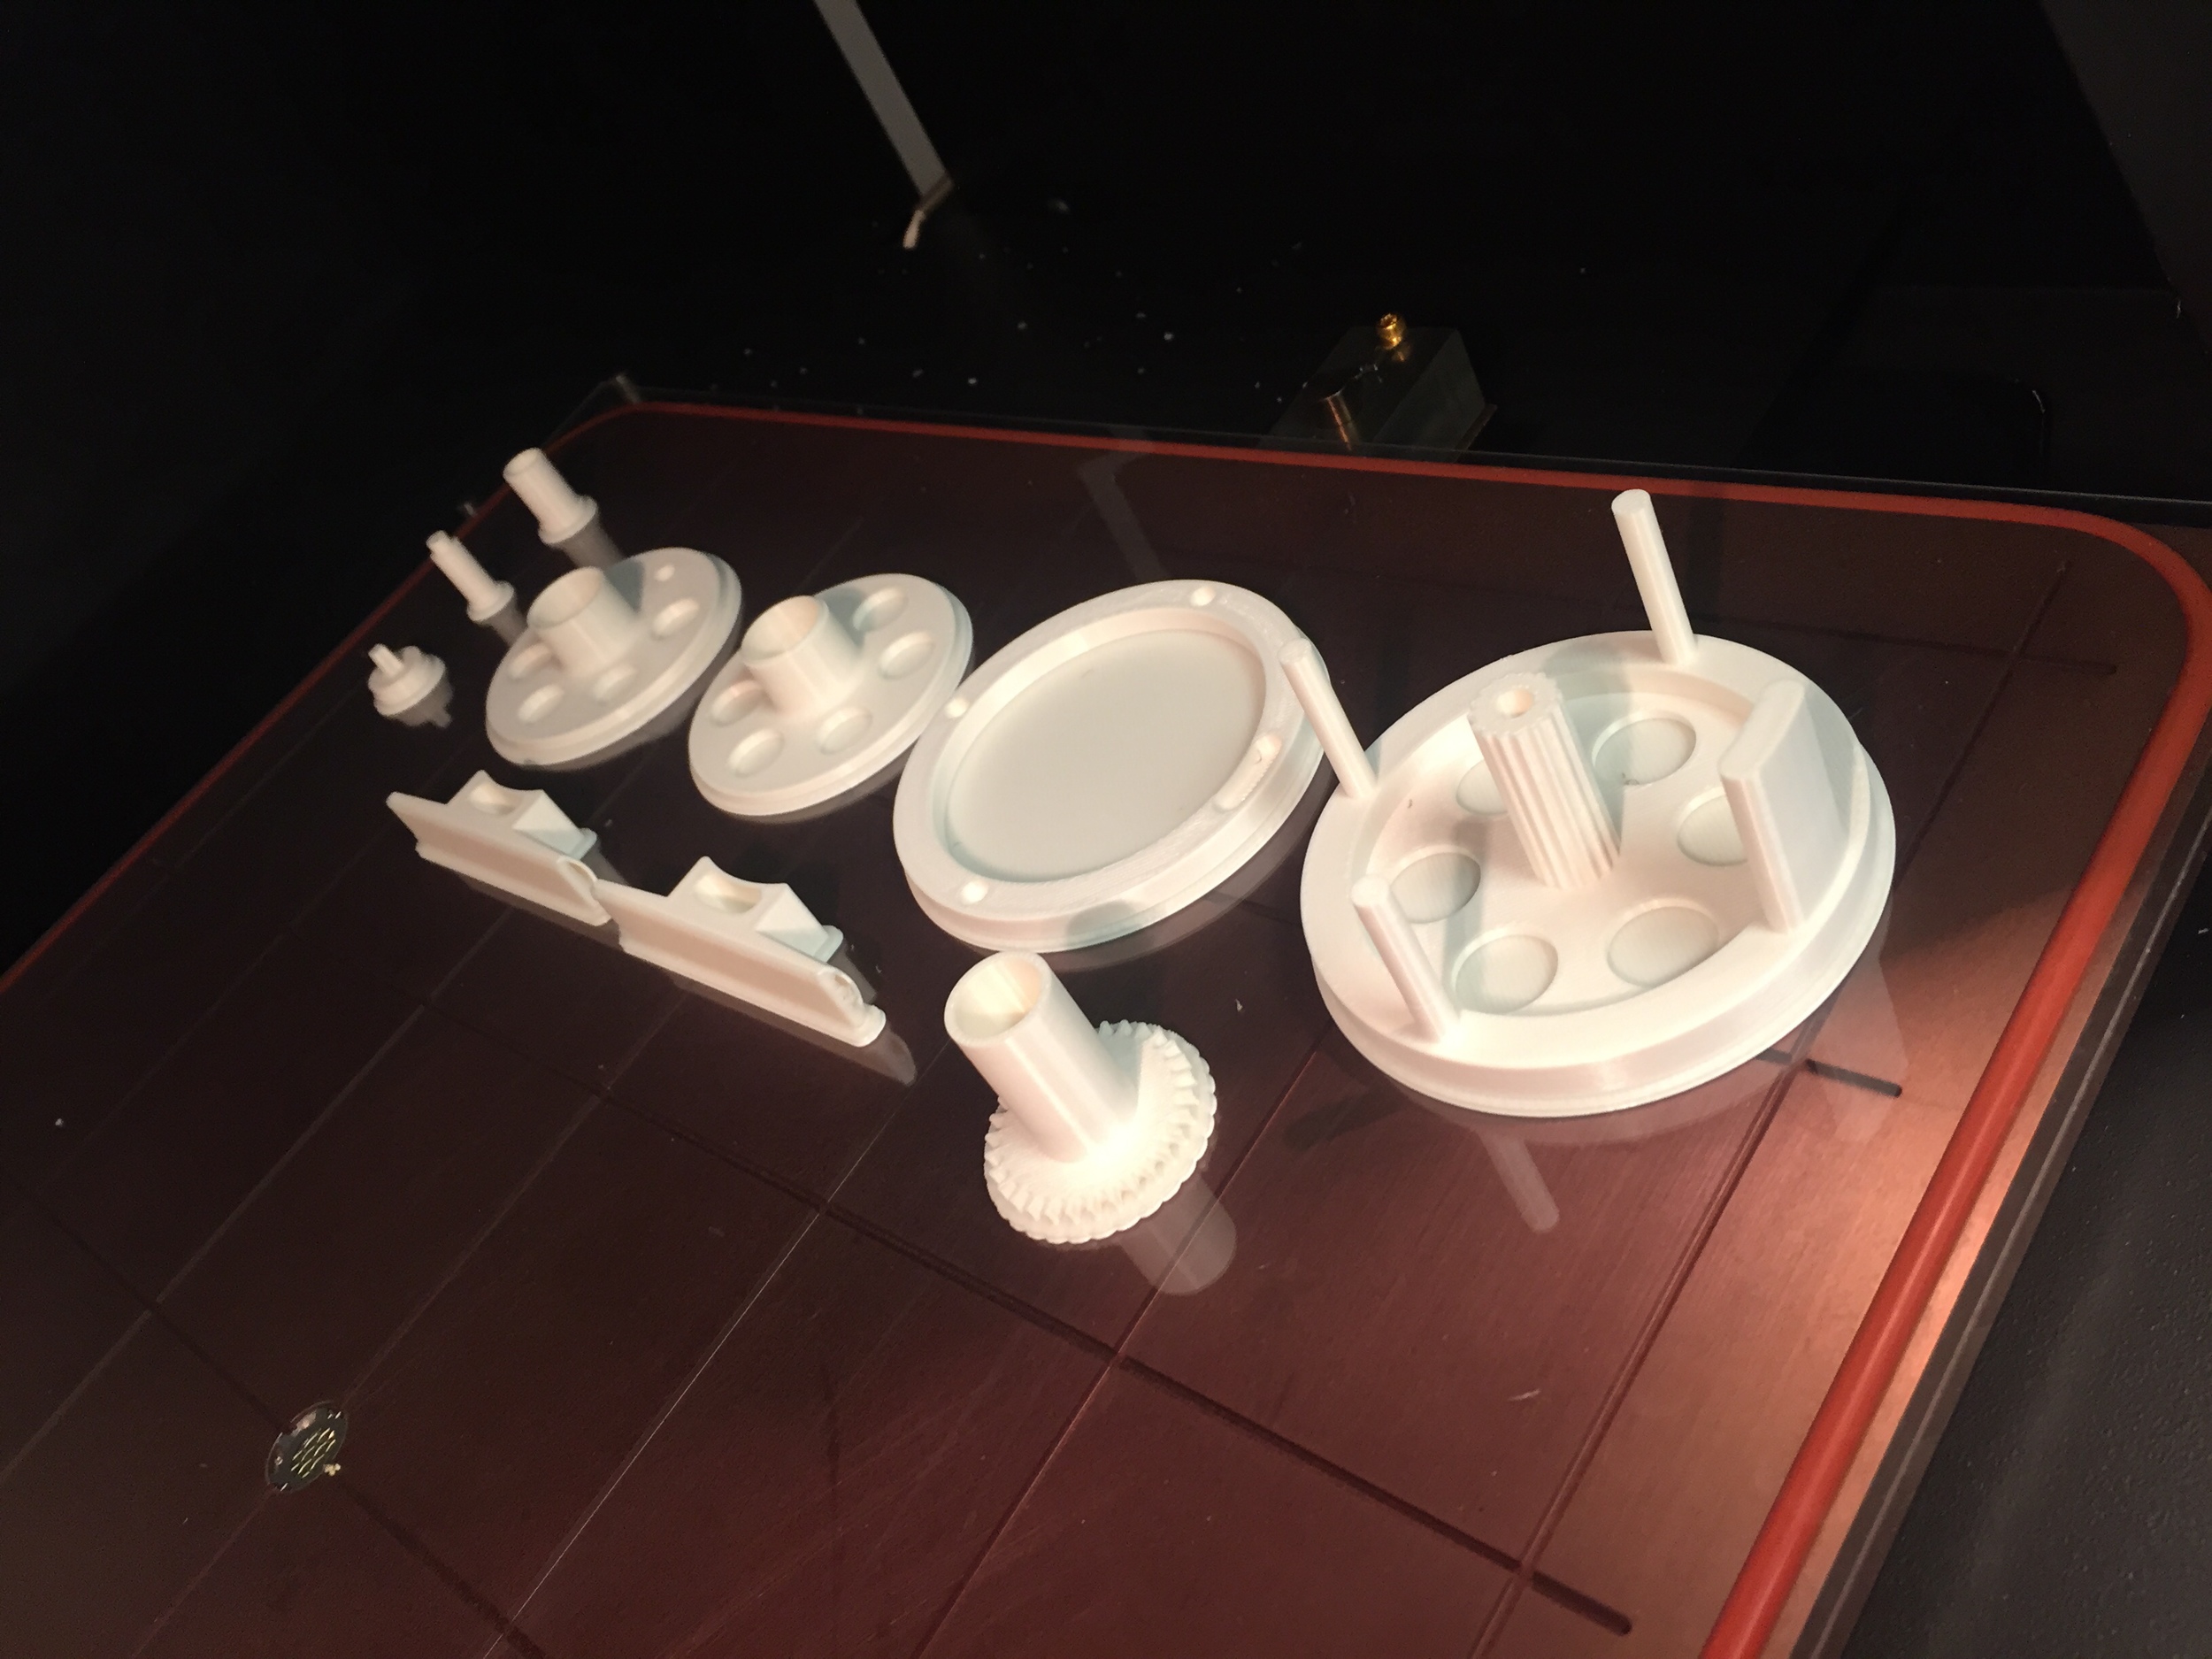
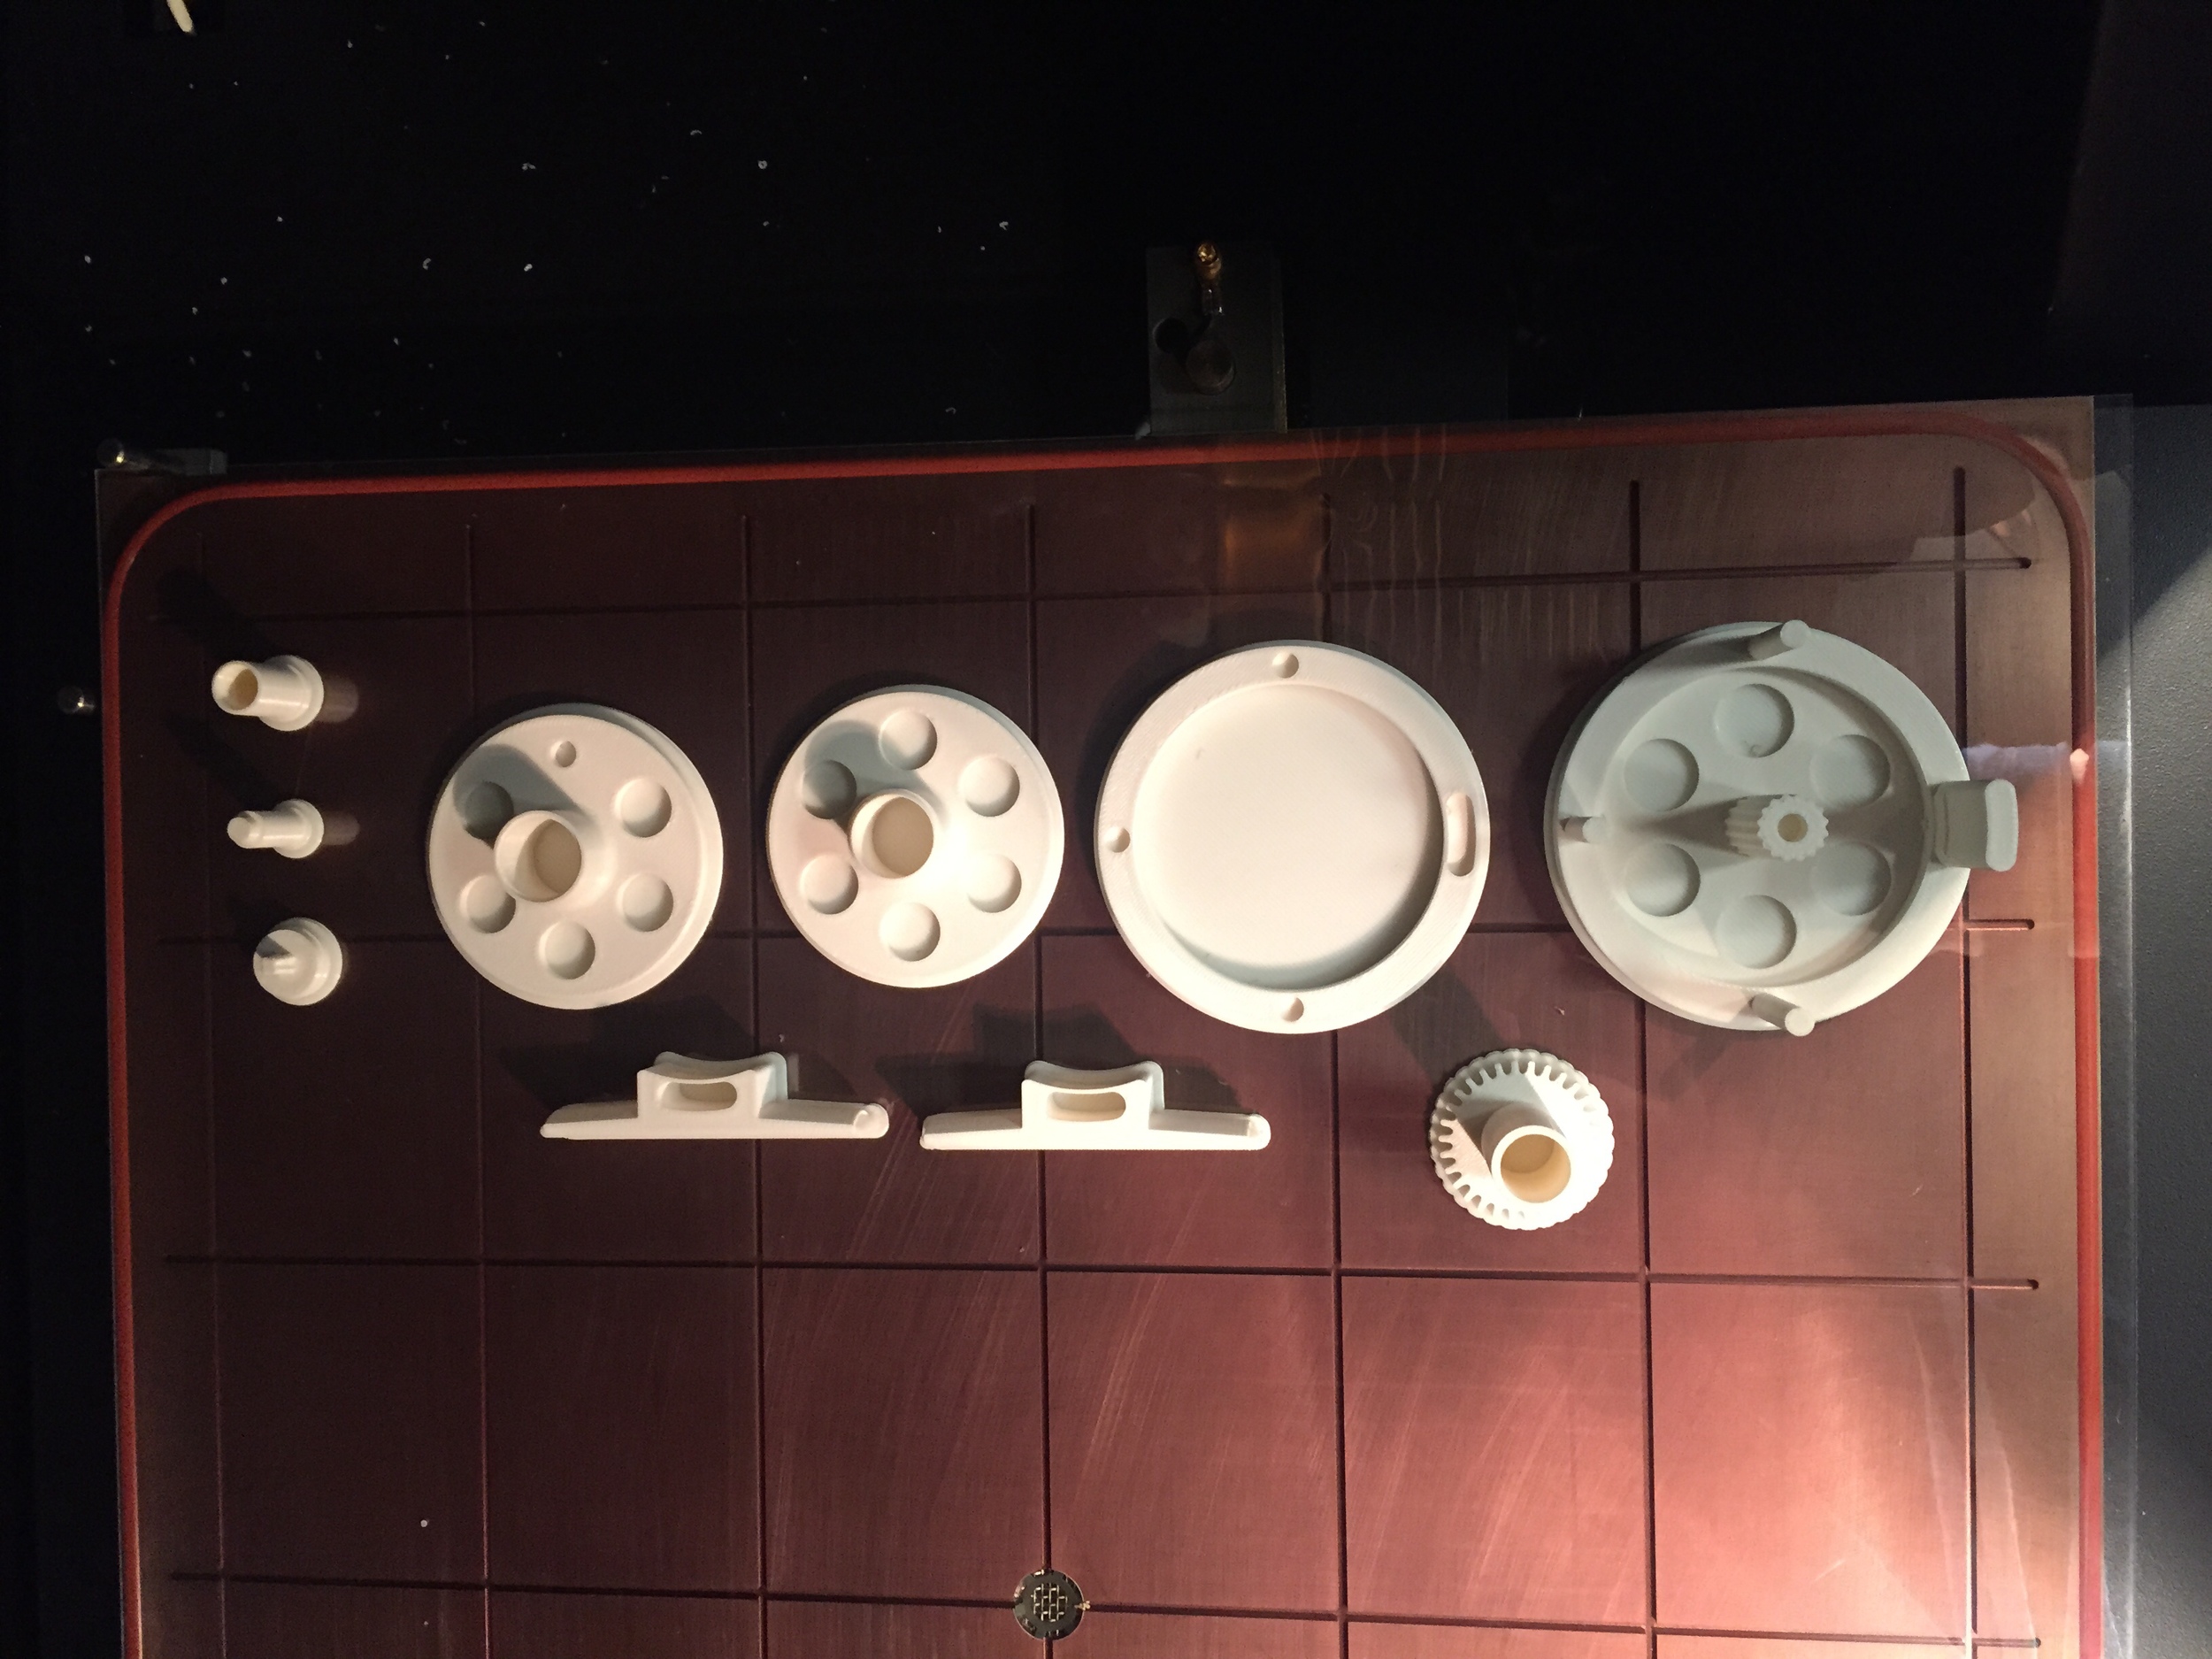
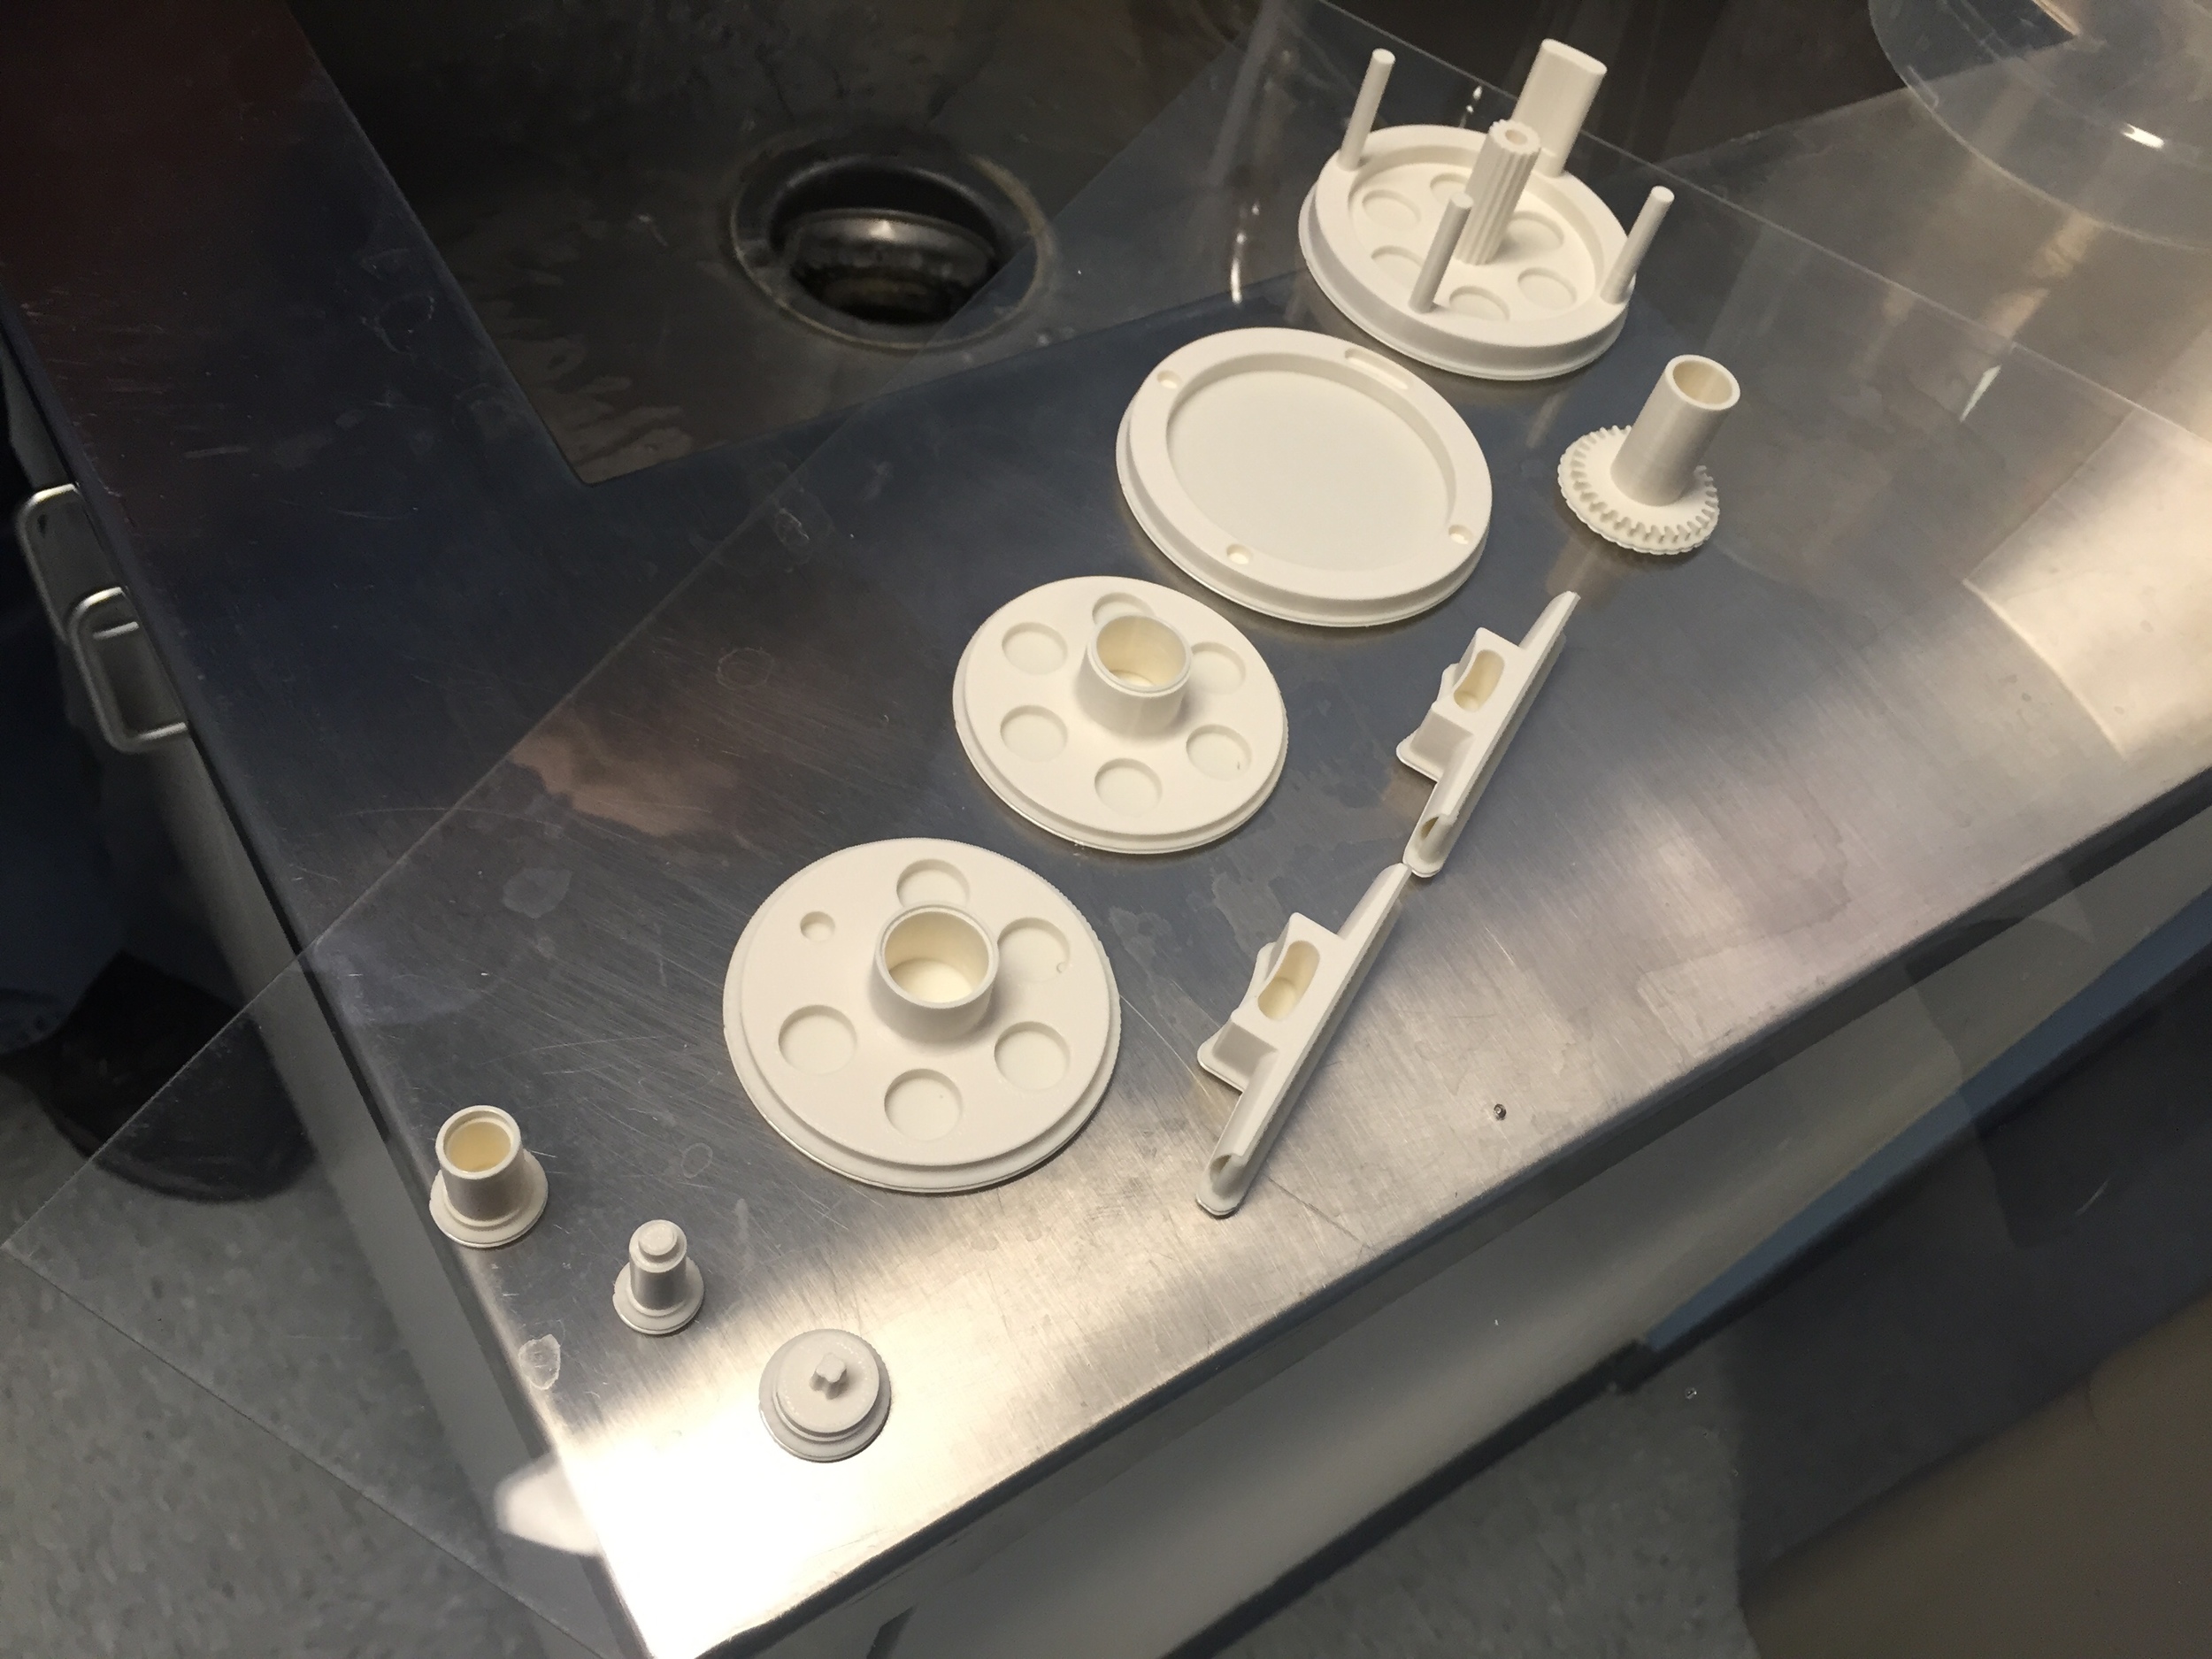
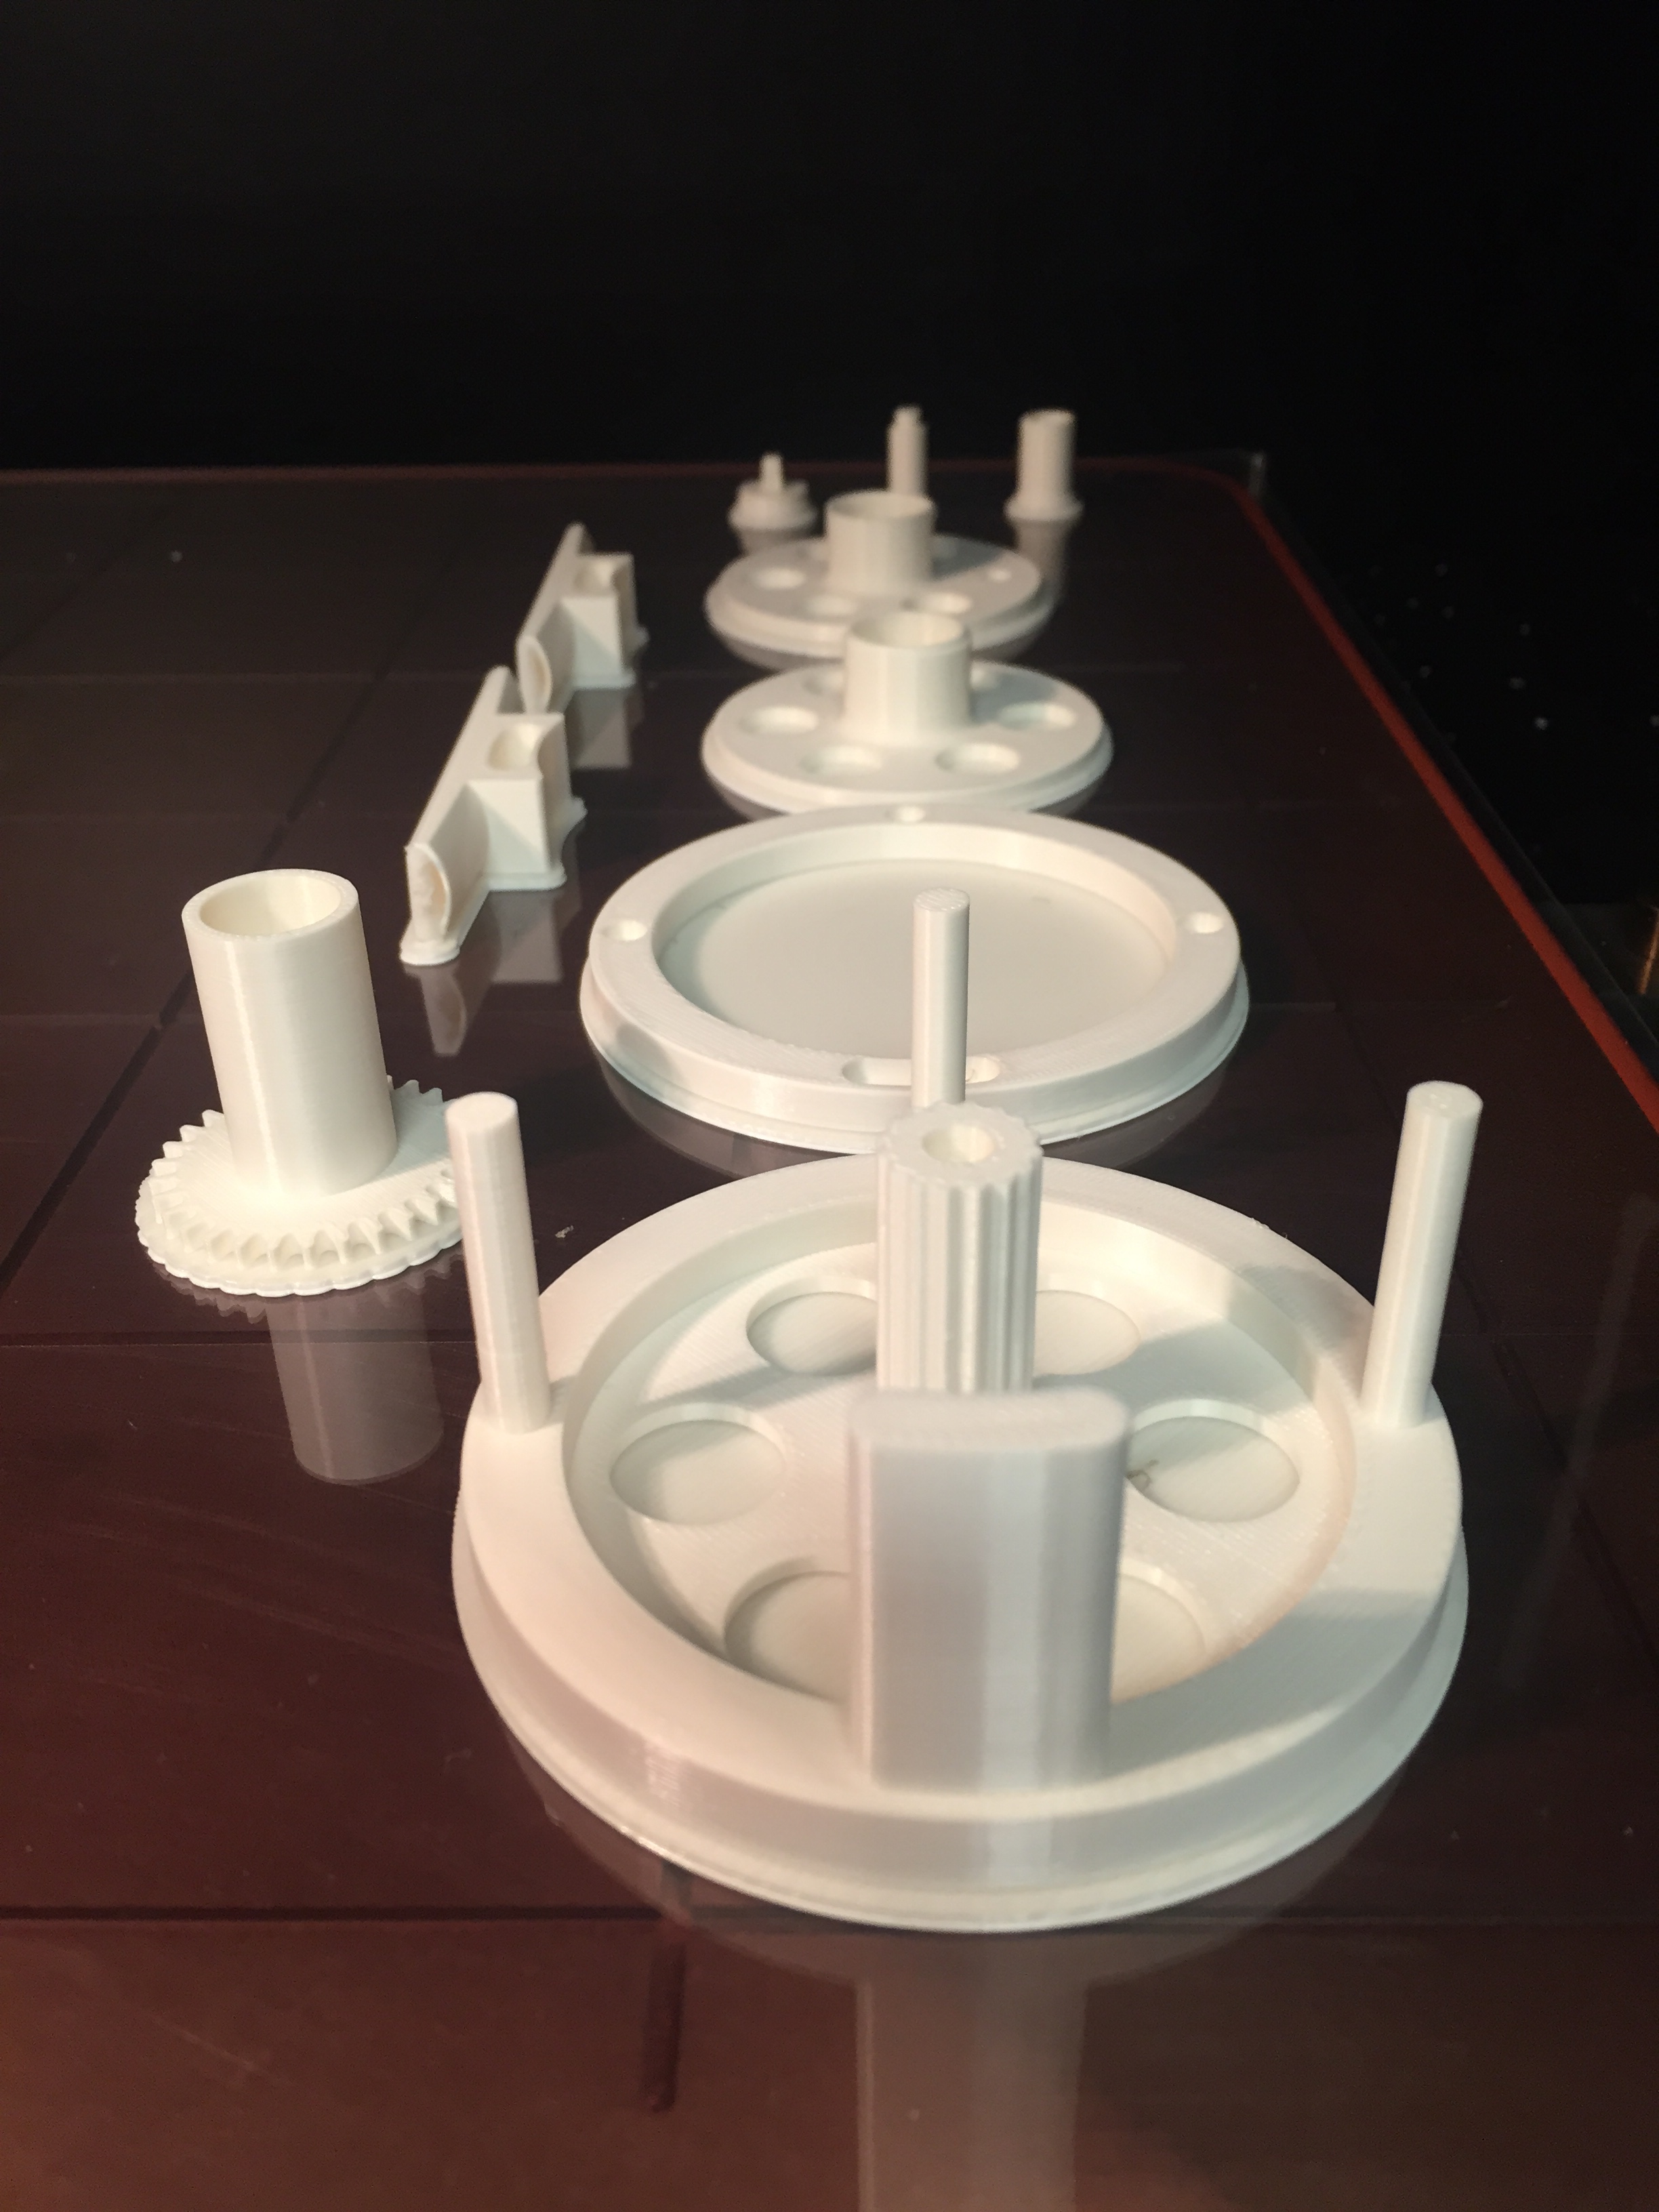
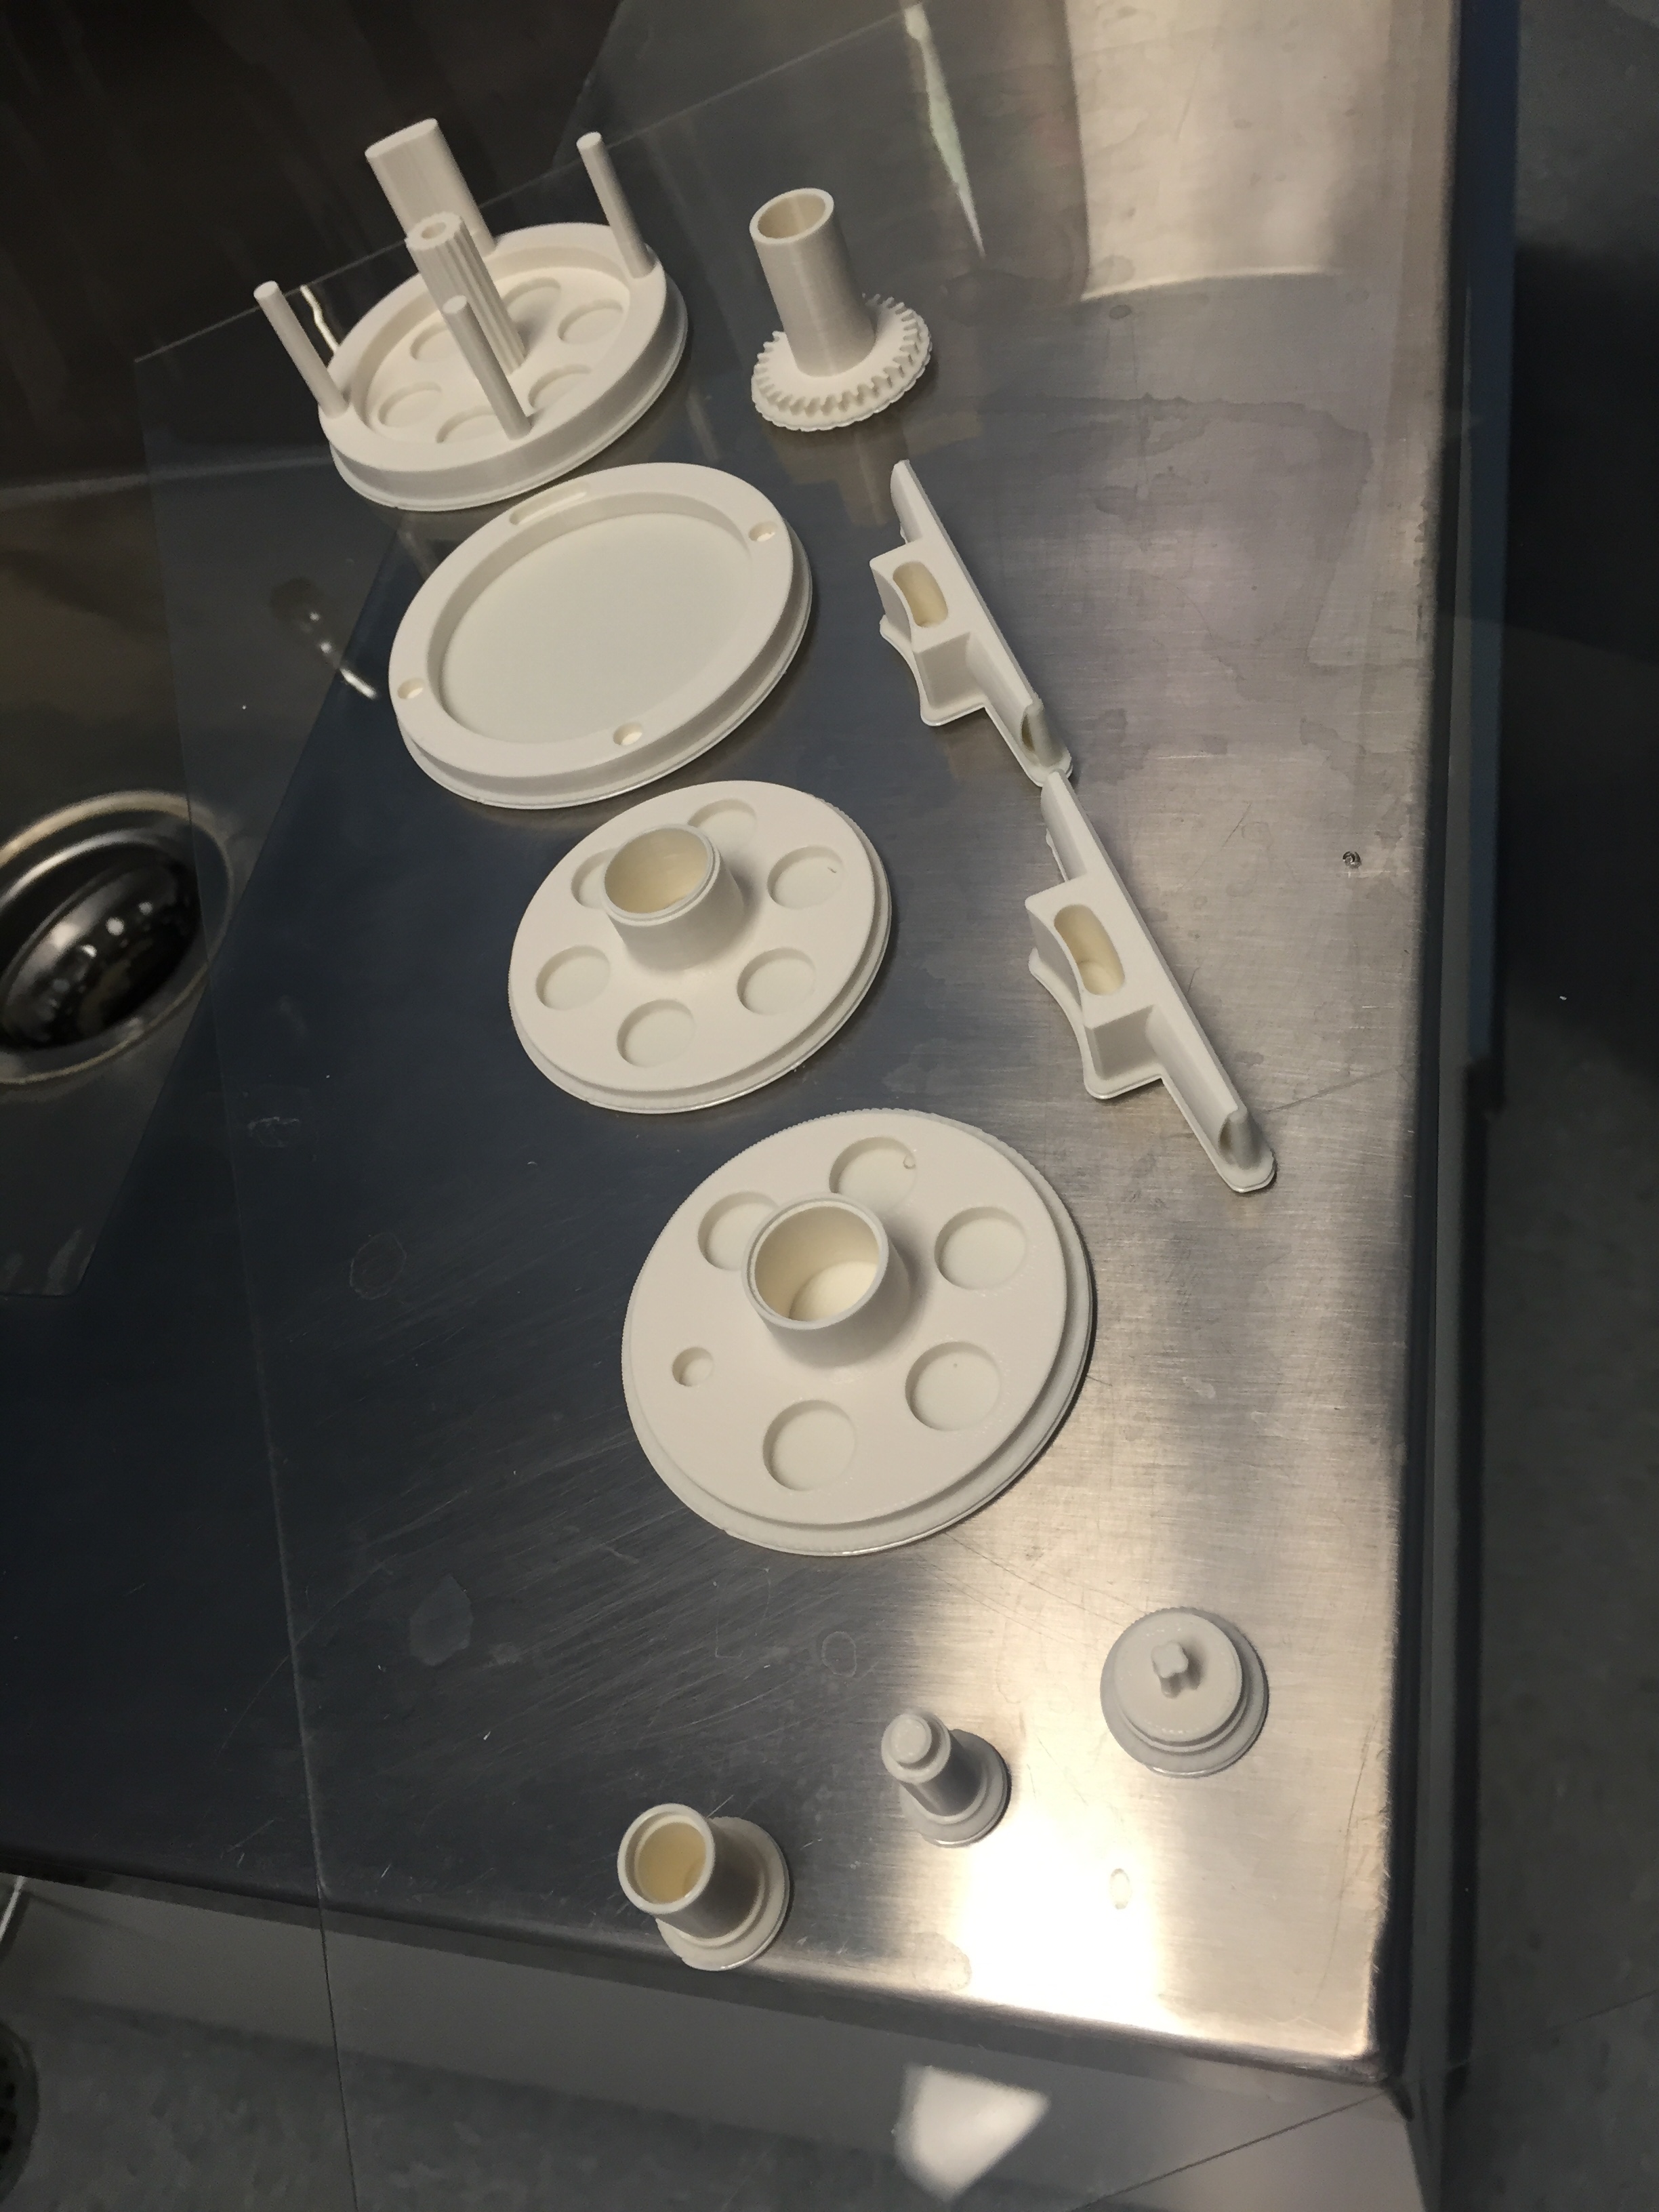
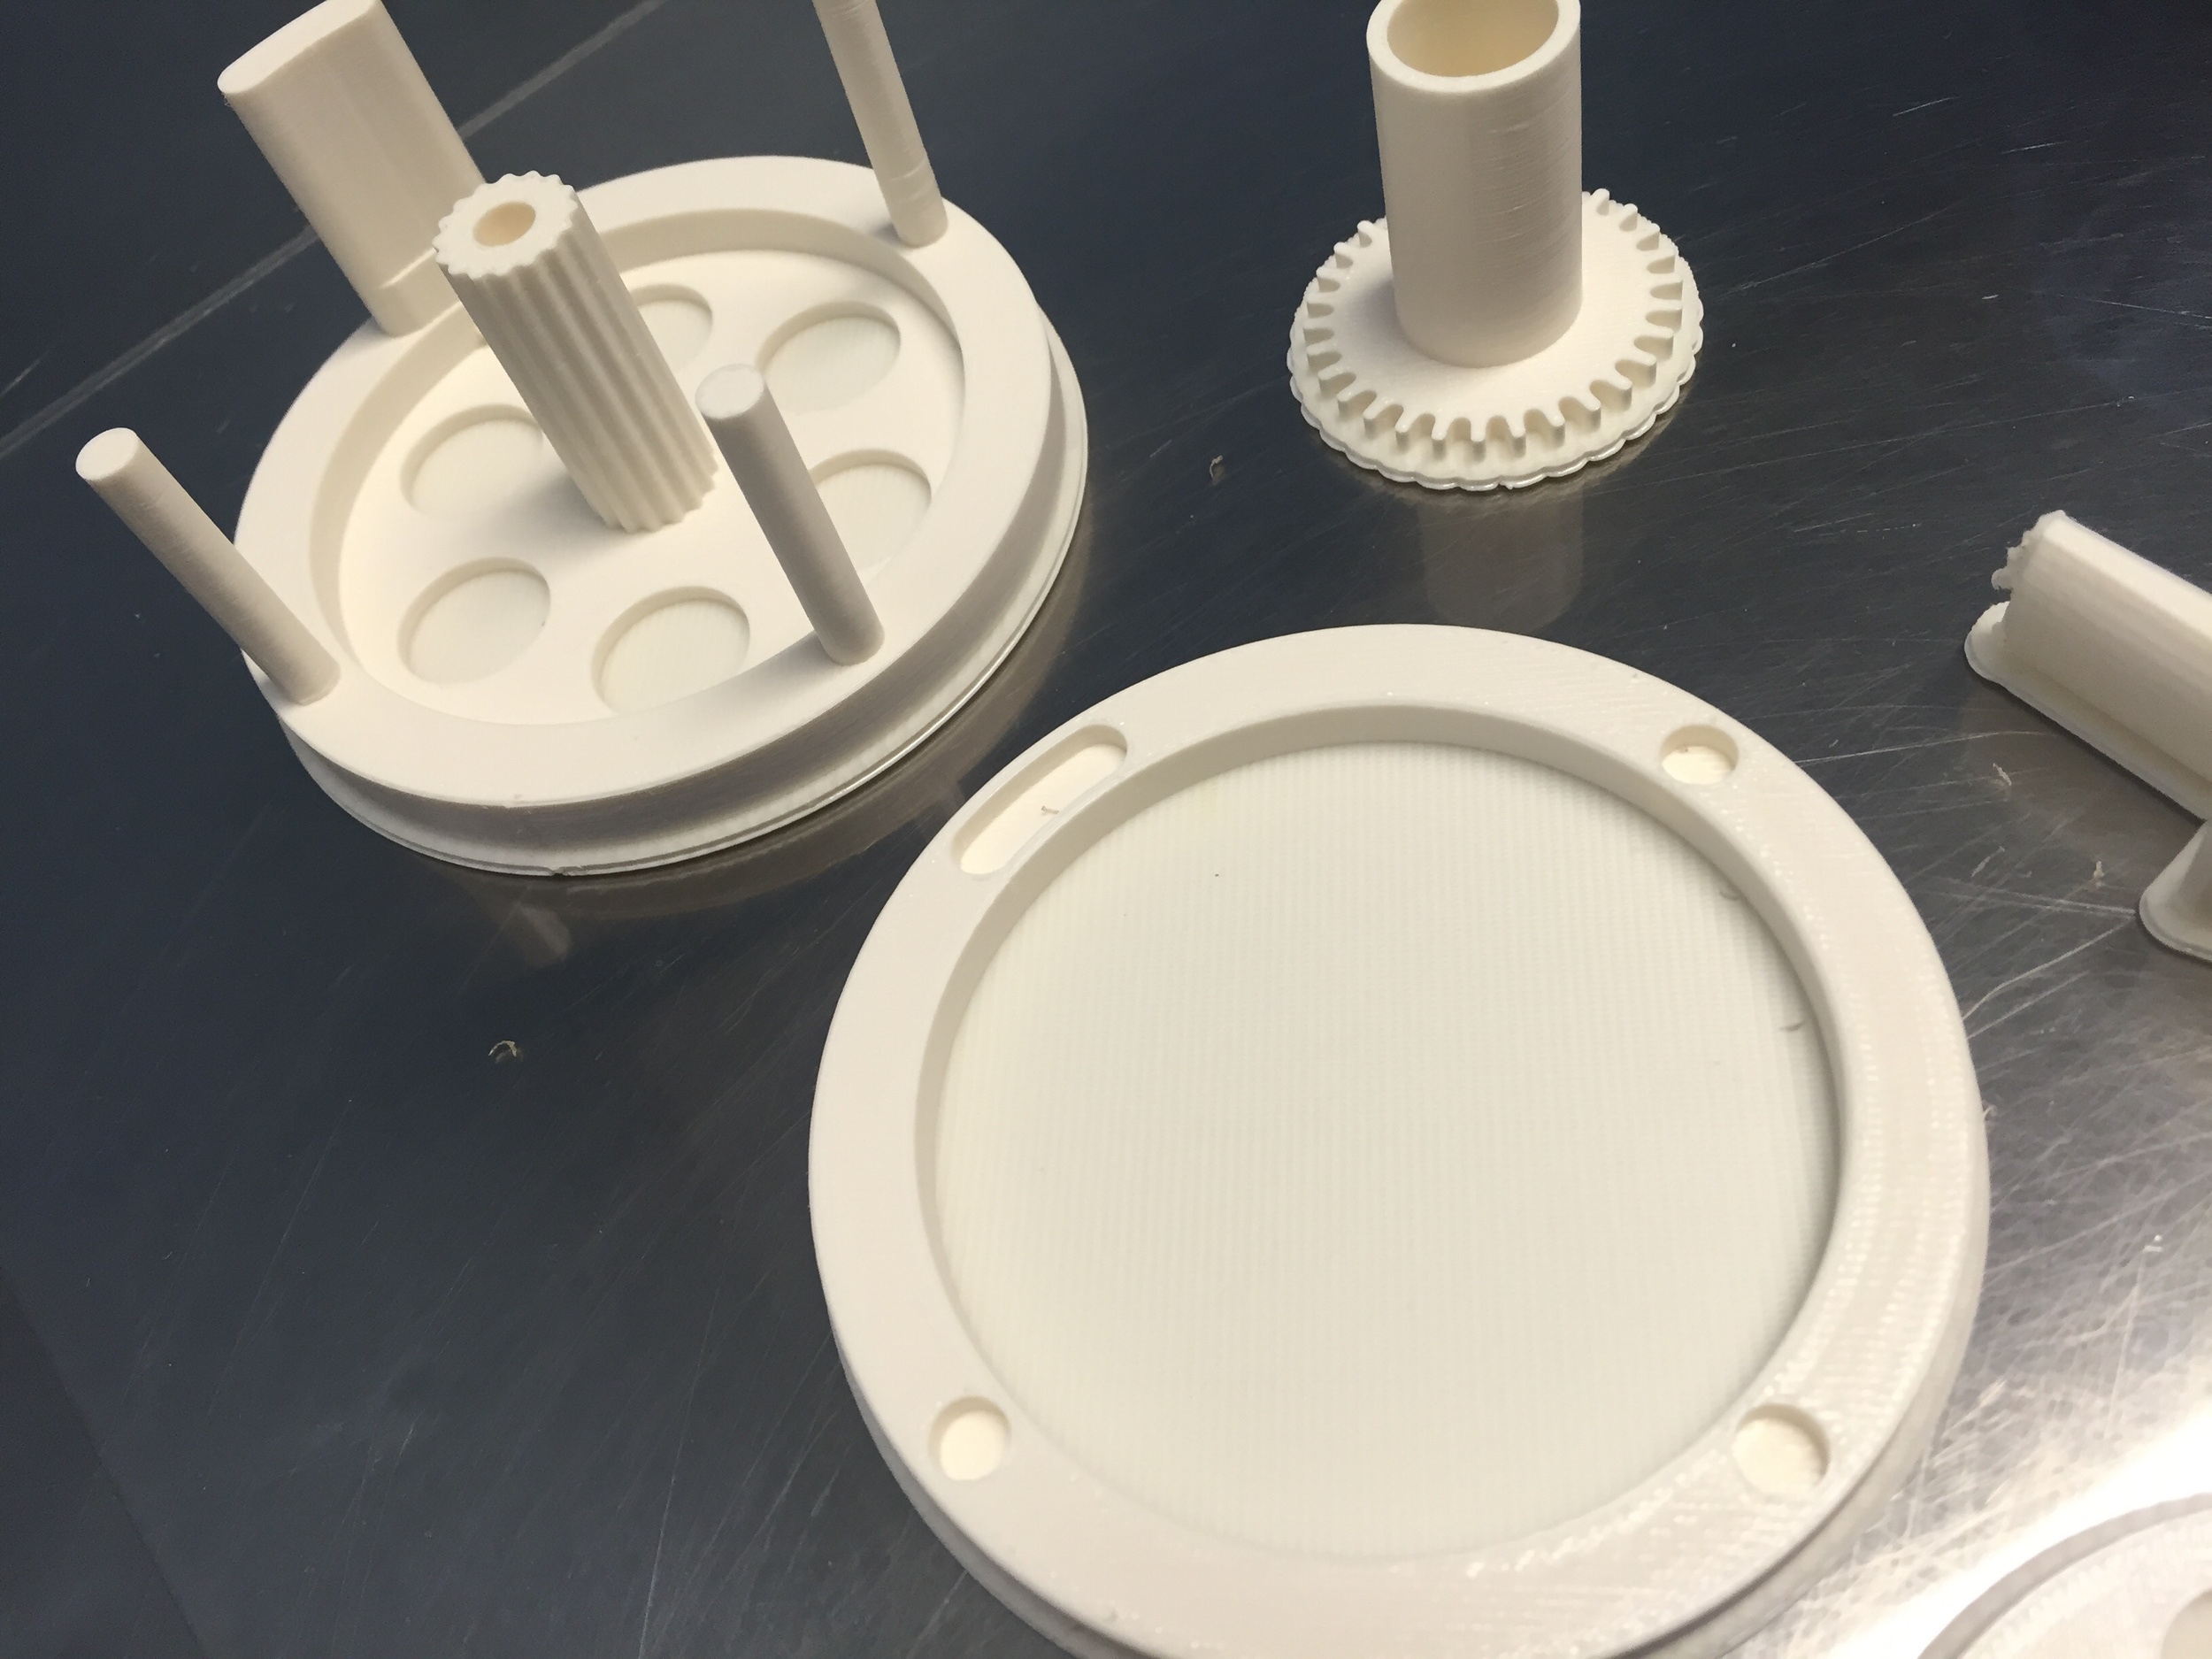
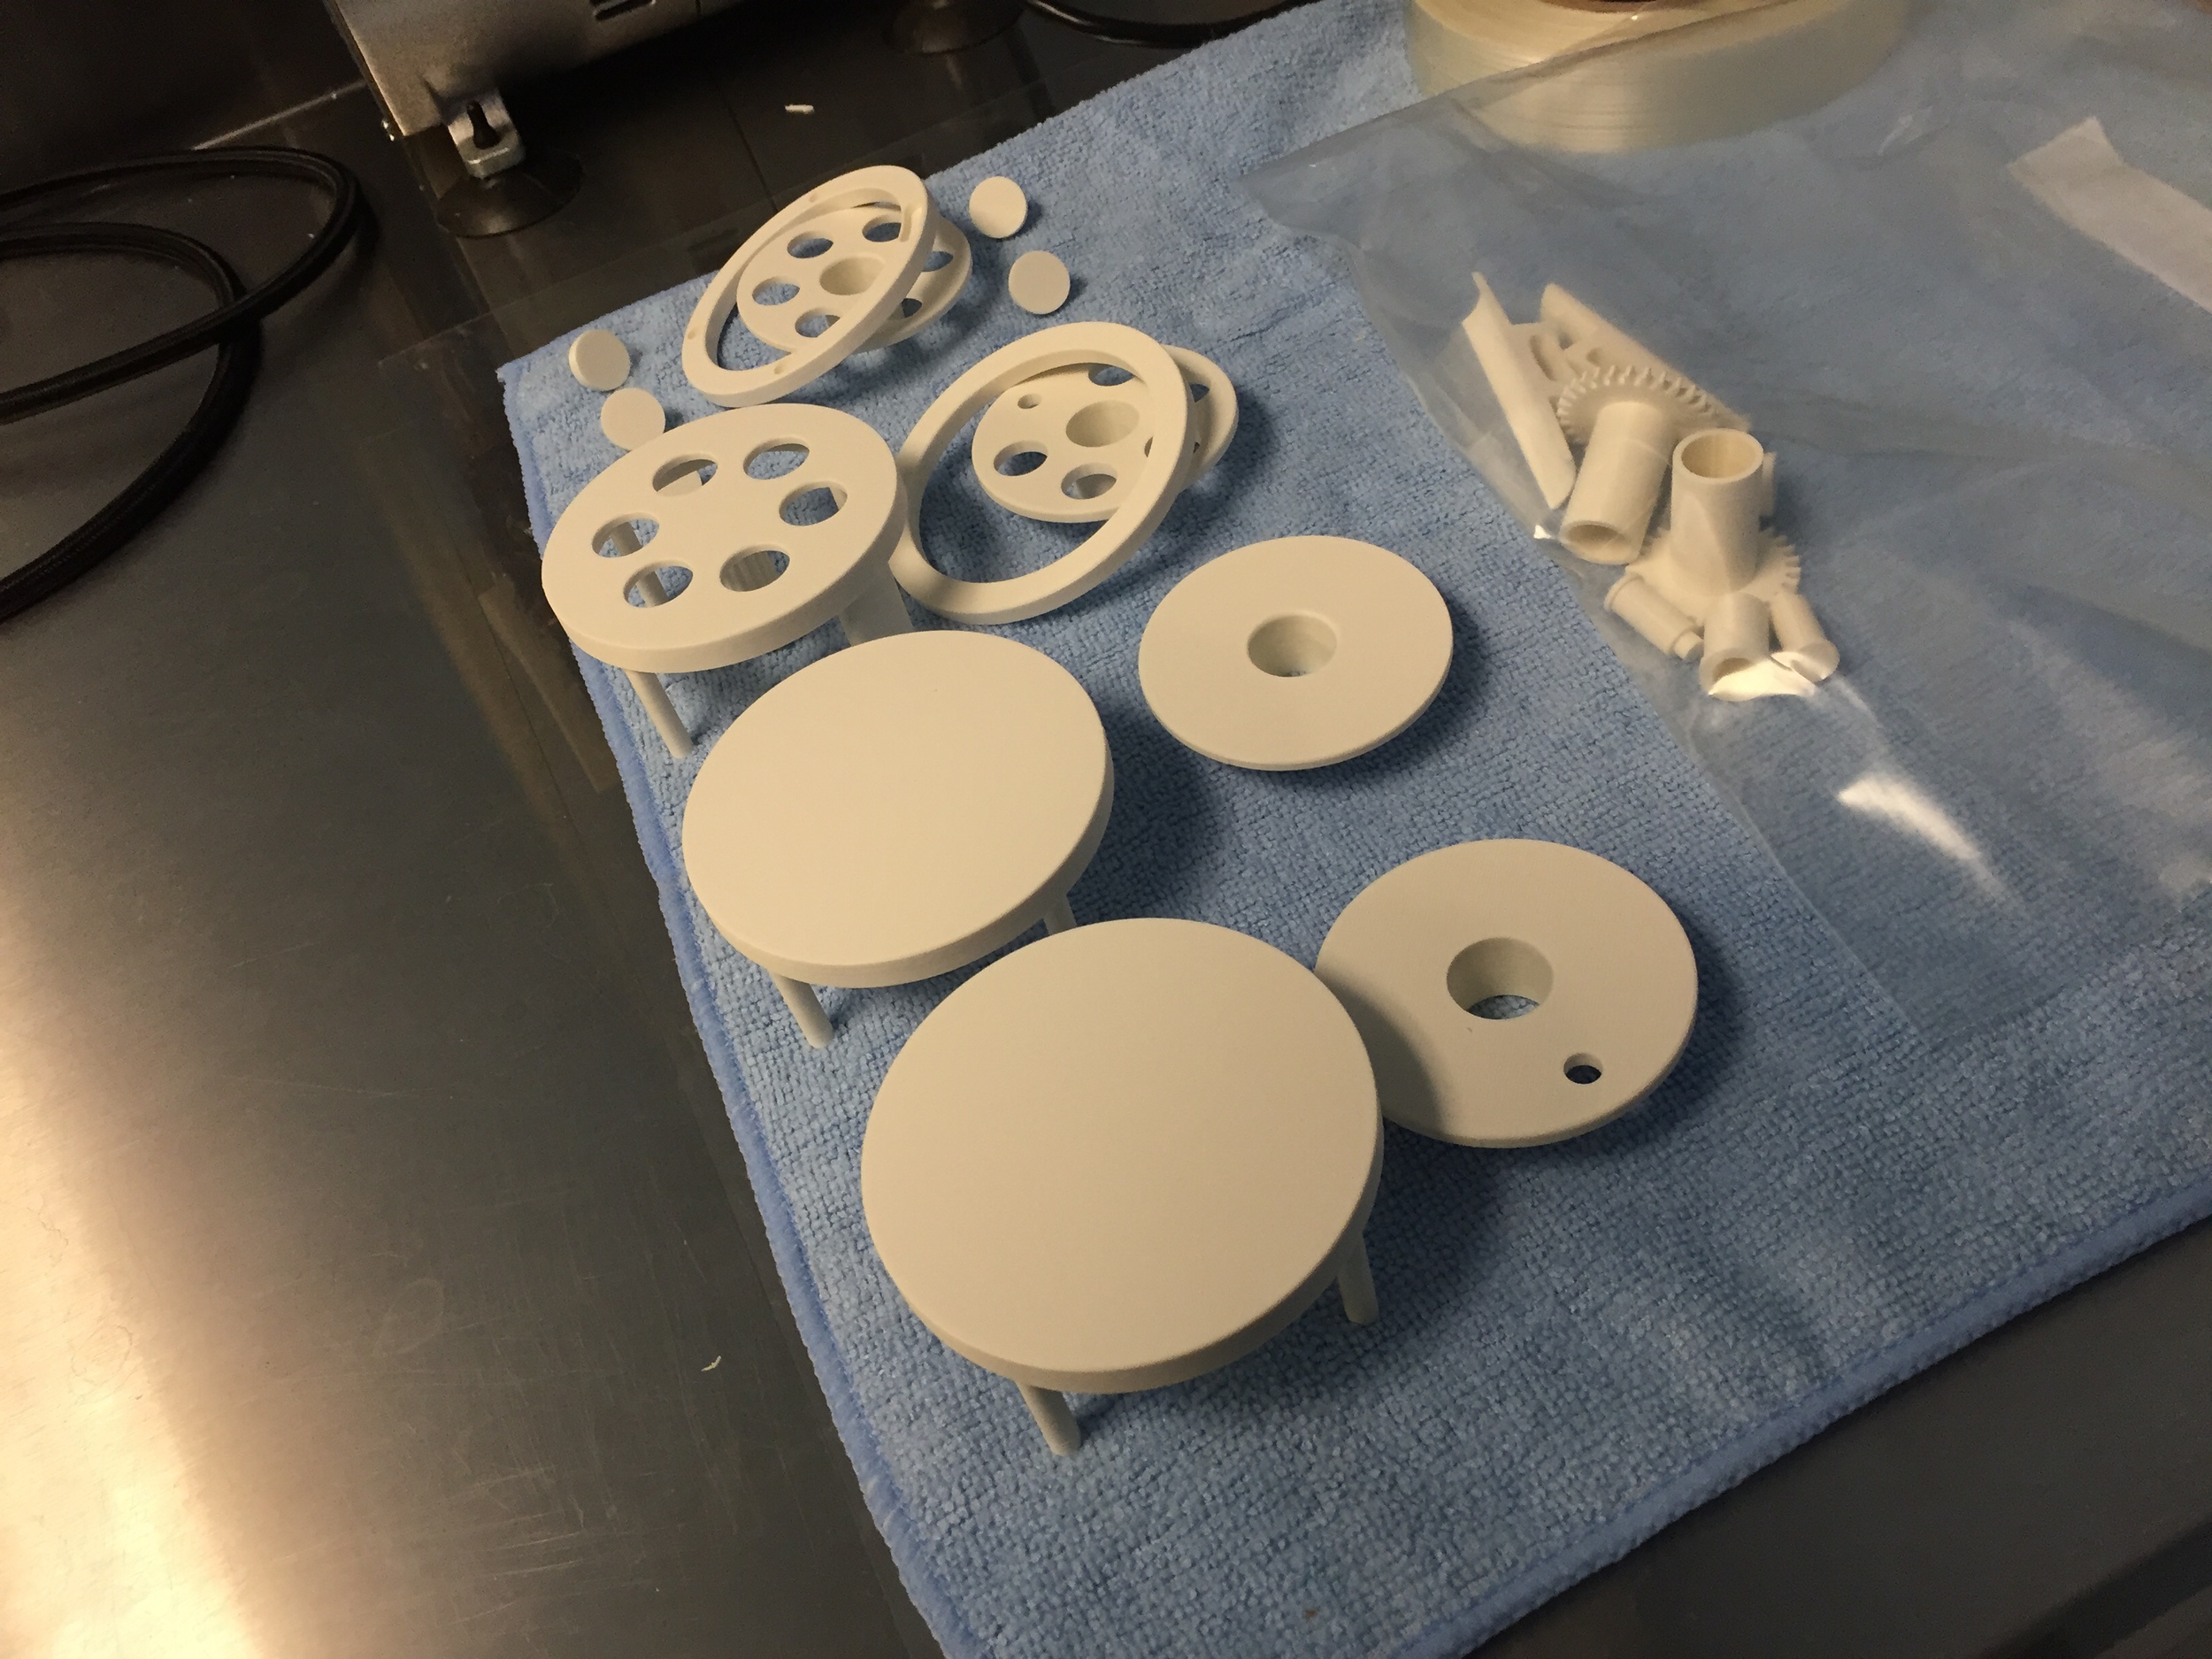
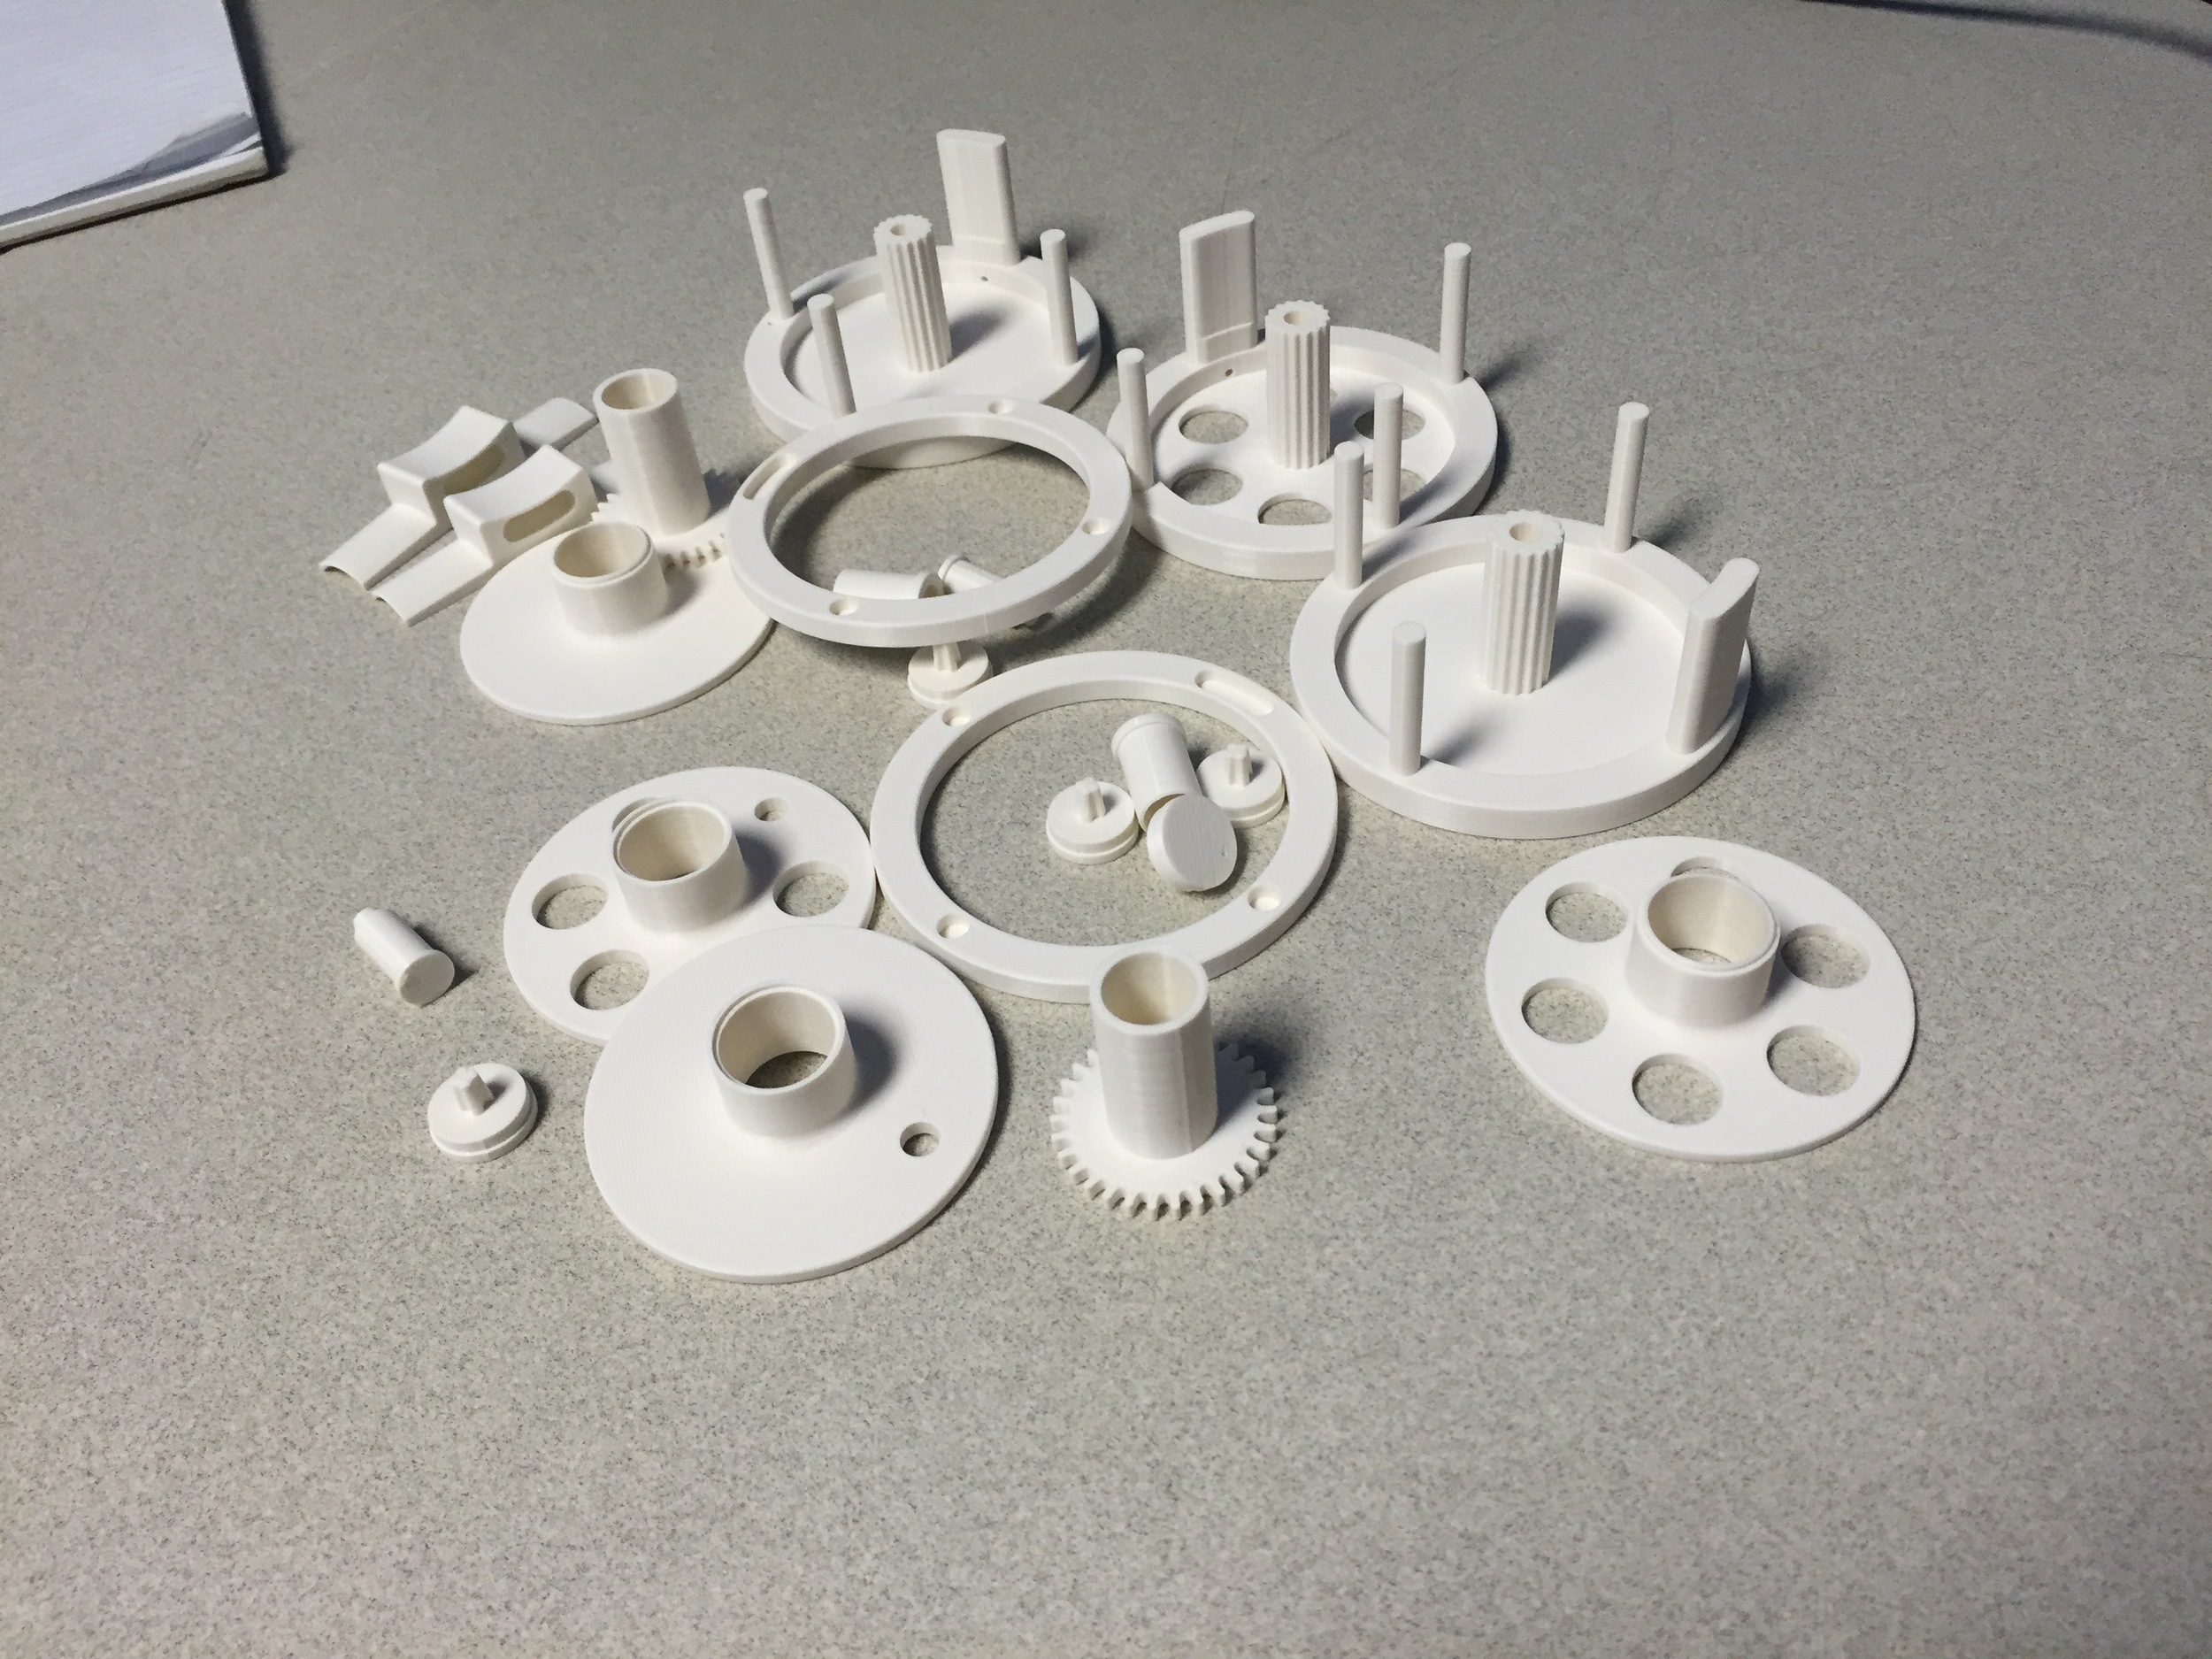
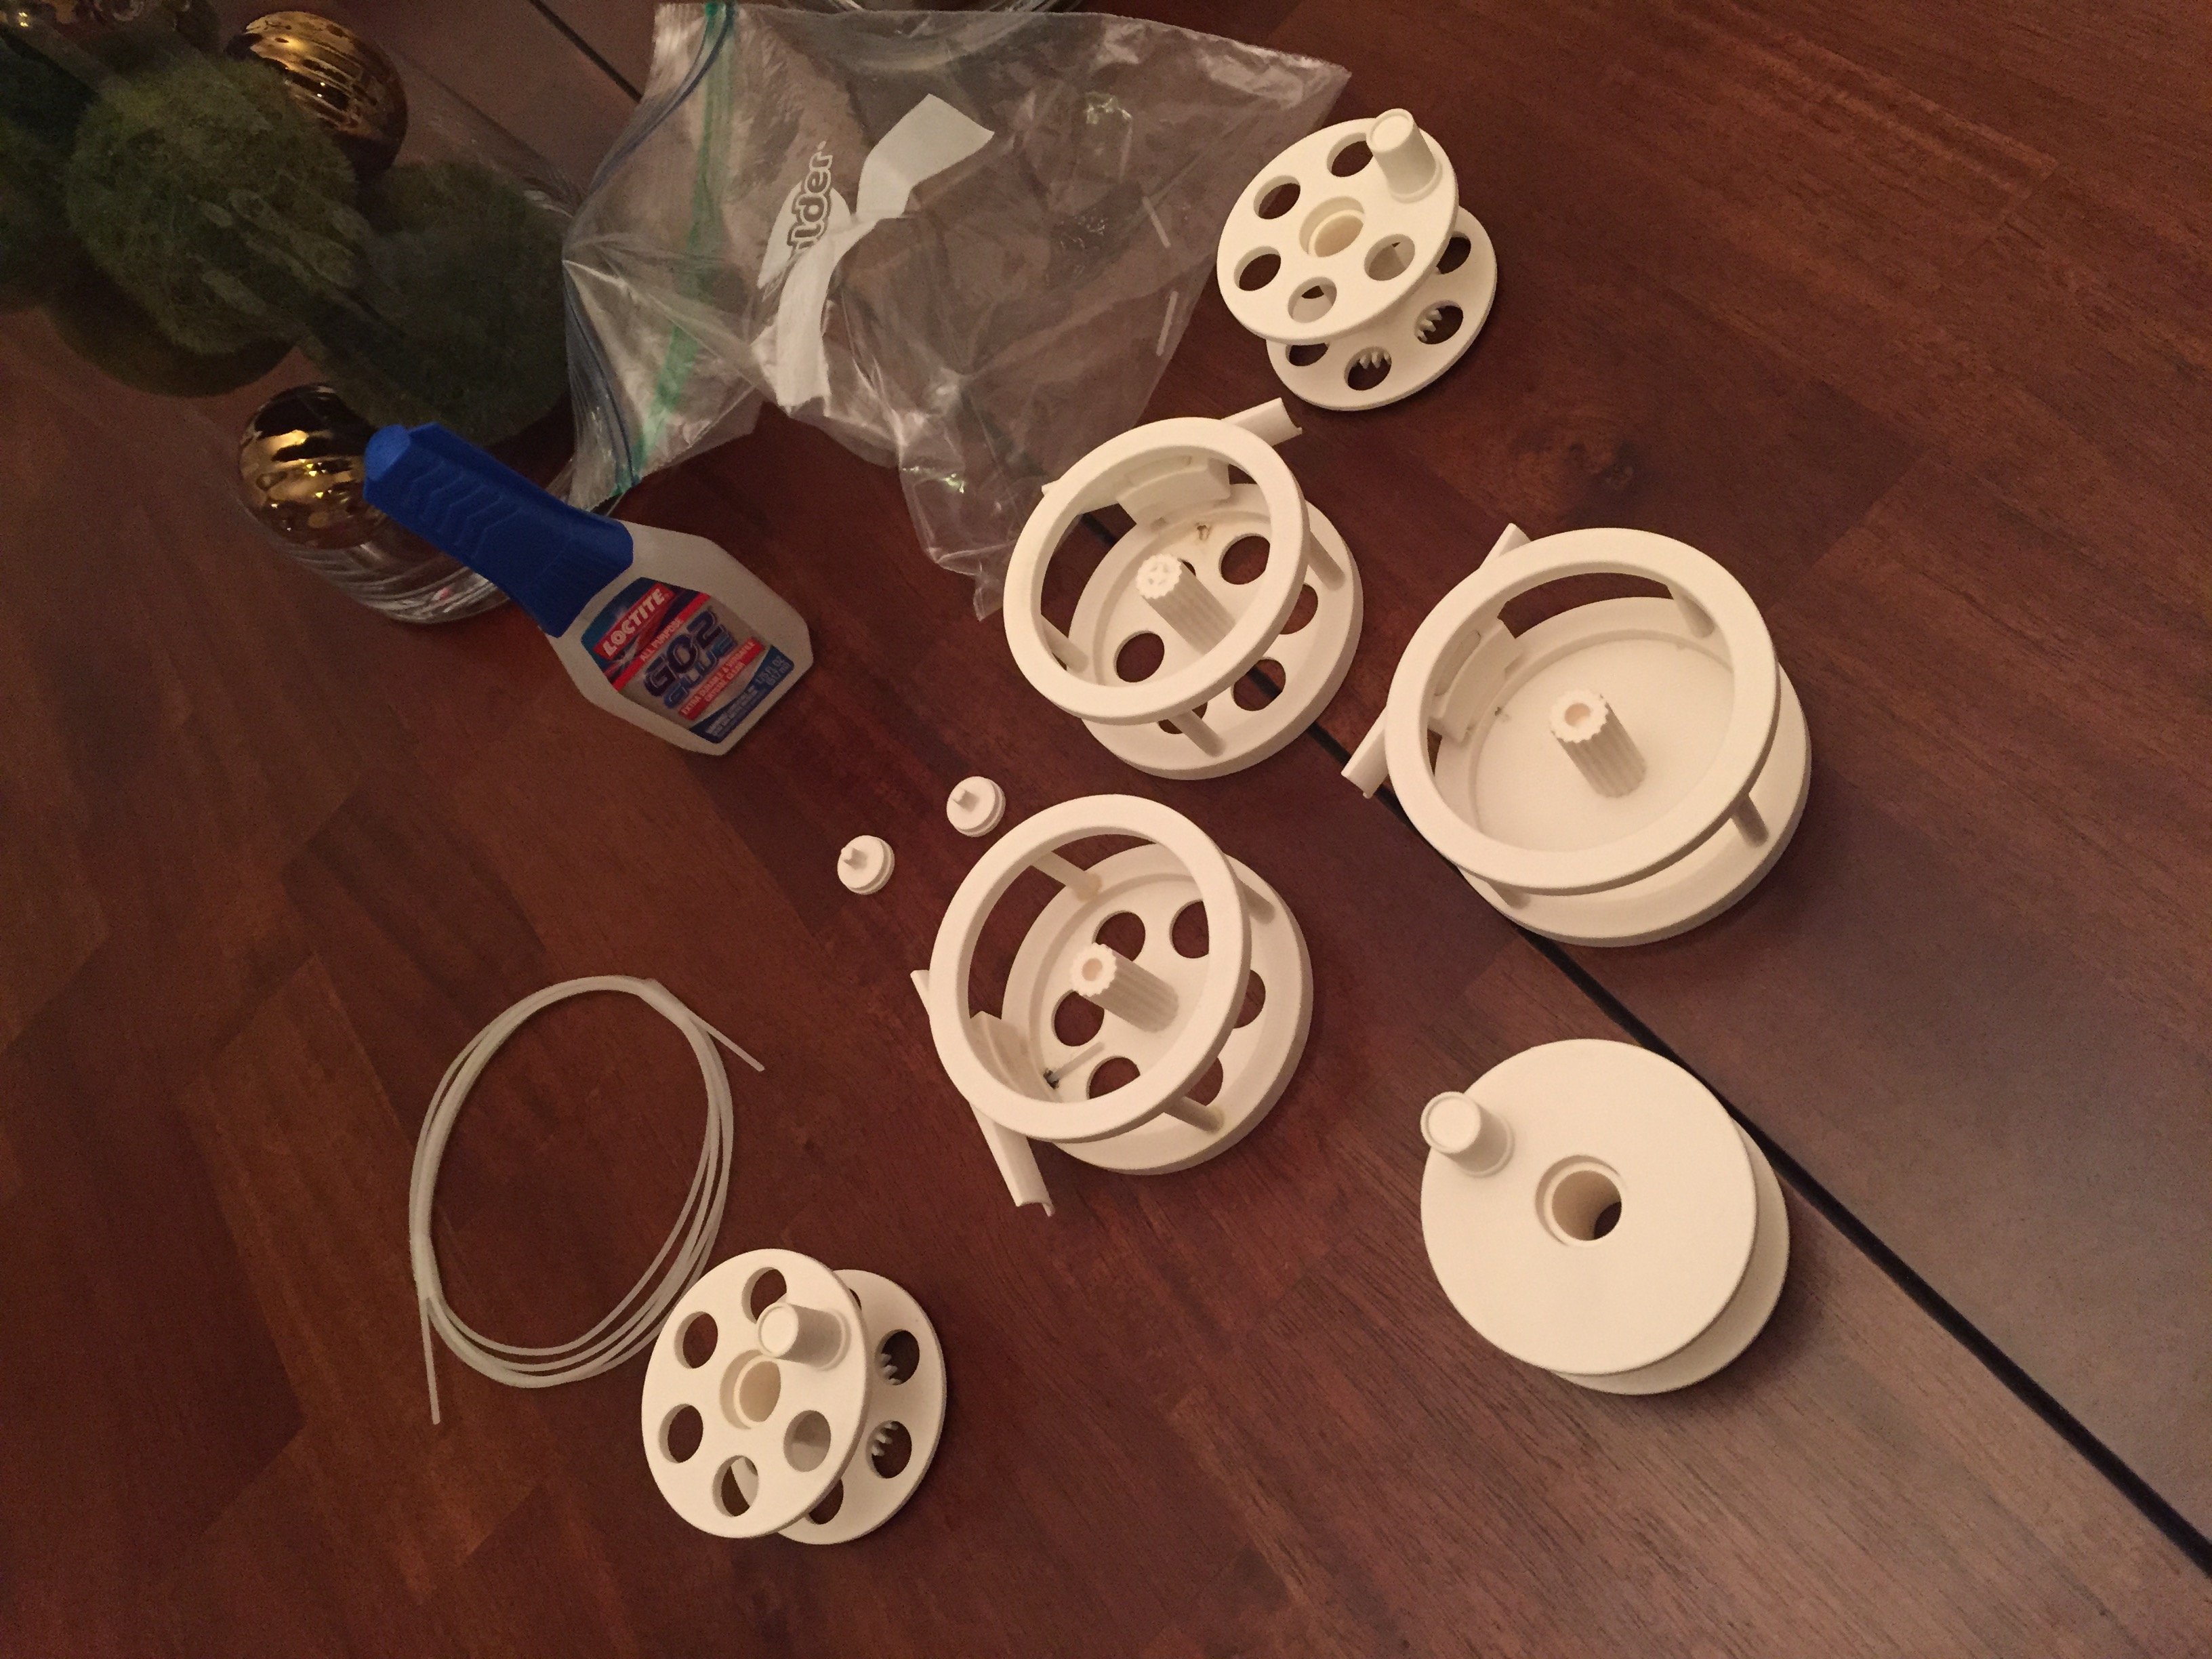
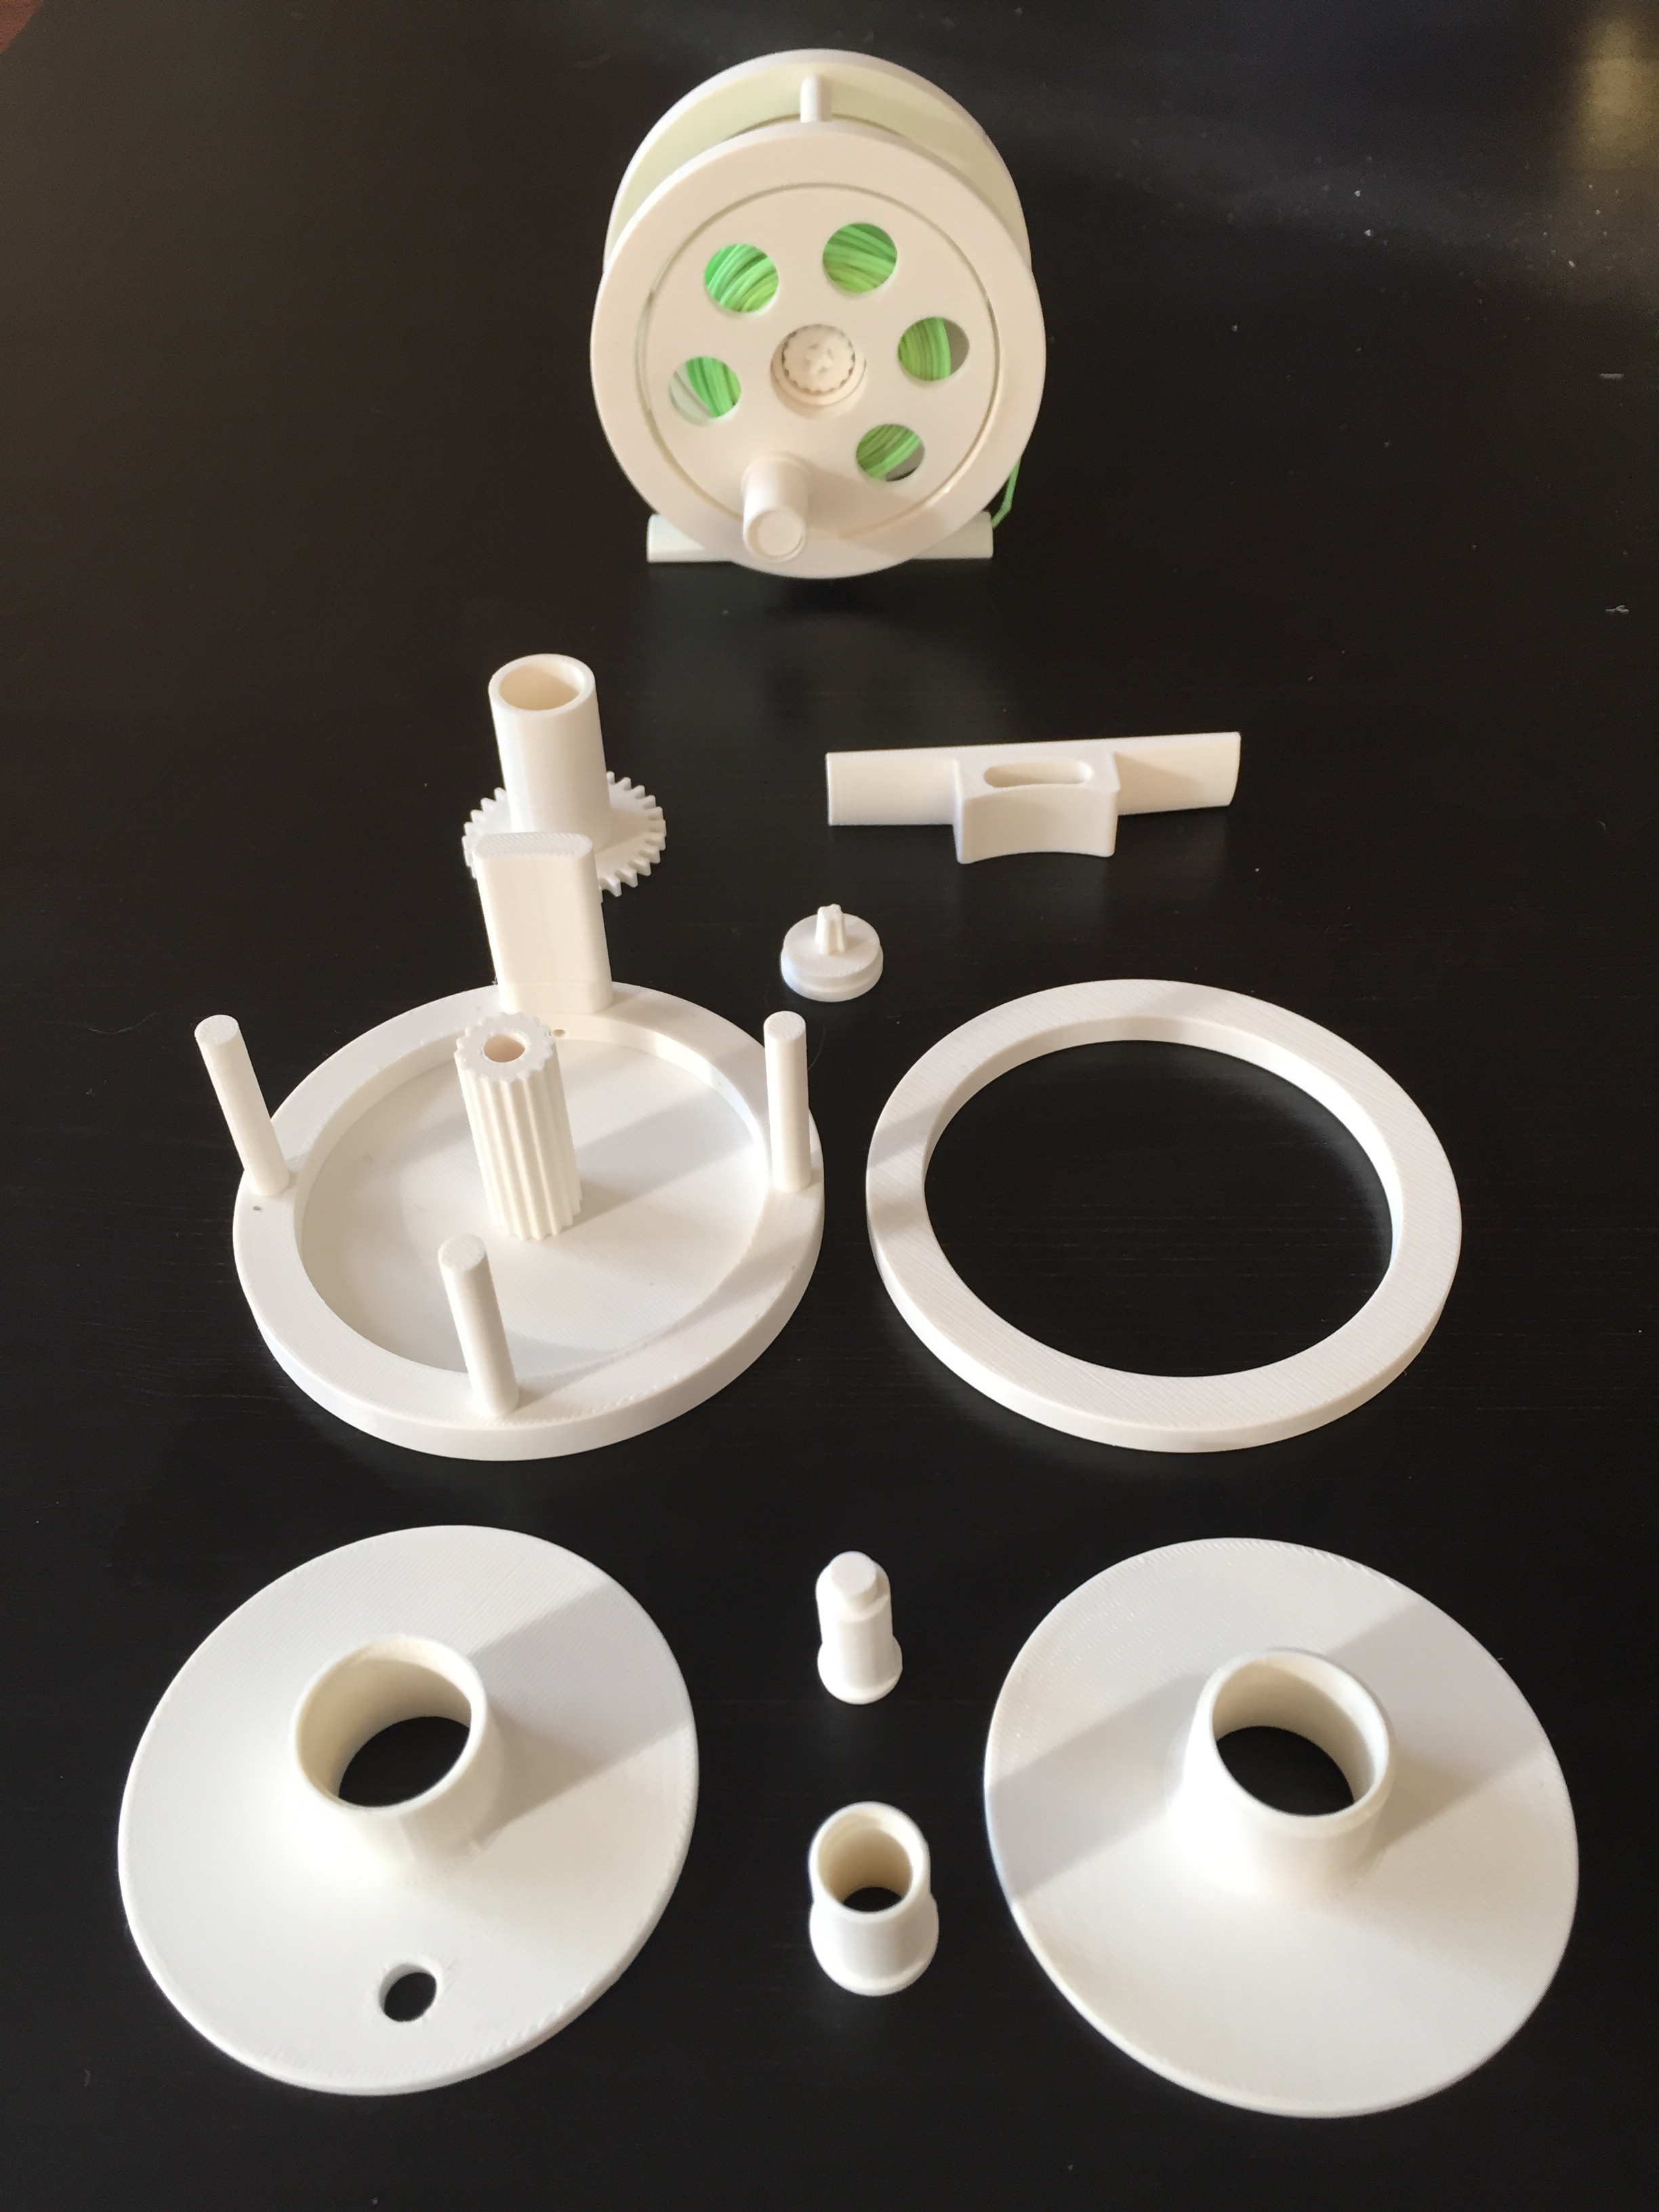
My plan is/was to have a couple of different versions and want to include both of the different technologies, from the 3D printing standpoint, that we offer. So for the first reel, we took the easy route and used Mike's reel design, processed the files for the layer thickness we wanted (.0050"), and laid it out on the print bed. Total print time would be six hours from start to finish. This meant we could have cleaned, finished reels, in about eight hours total, including the required post processing. We used a standard ABS plastic, similar to what's used in most injection molding processes.
The way the reel is built is call FDM or fused deposition modeling. To make a good comparison, imagine taking a hot glue gun, and taking weed wacker cord filament, and push it through the tip of the hot glue gun. The plastic will melt as it's extruded from the tip, and the layers will adhere to each other. The tip will trace out wherever material needs to be present, leaving a finished part. (see illustration) Depending on the machine you're using to produce the parts, you can determine how thick each layer is, yielding faster build times or a part with better resolution or greater accuracy.
The reel itself is a total of eight pieces, with two pieces making up the spool. Michael recommended using a small nylon filament extrusion for the clicker mechanism, which we found is definitely the way to go. That is after we tried about a dozen other options, all failing quickly, I finally caved and ordered the filament from Amazon. Sometimes I just want to find my own way, but will never hesitate relenting to what's proven.
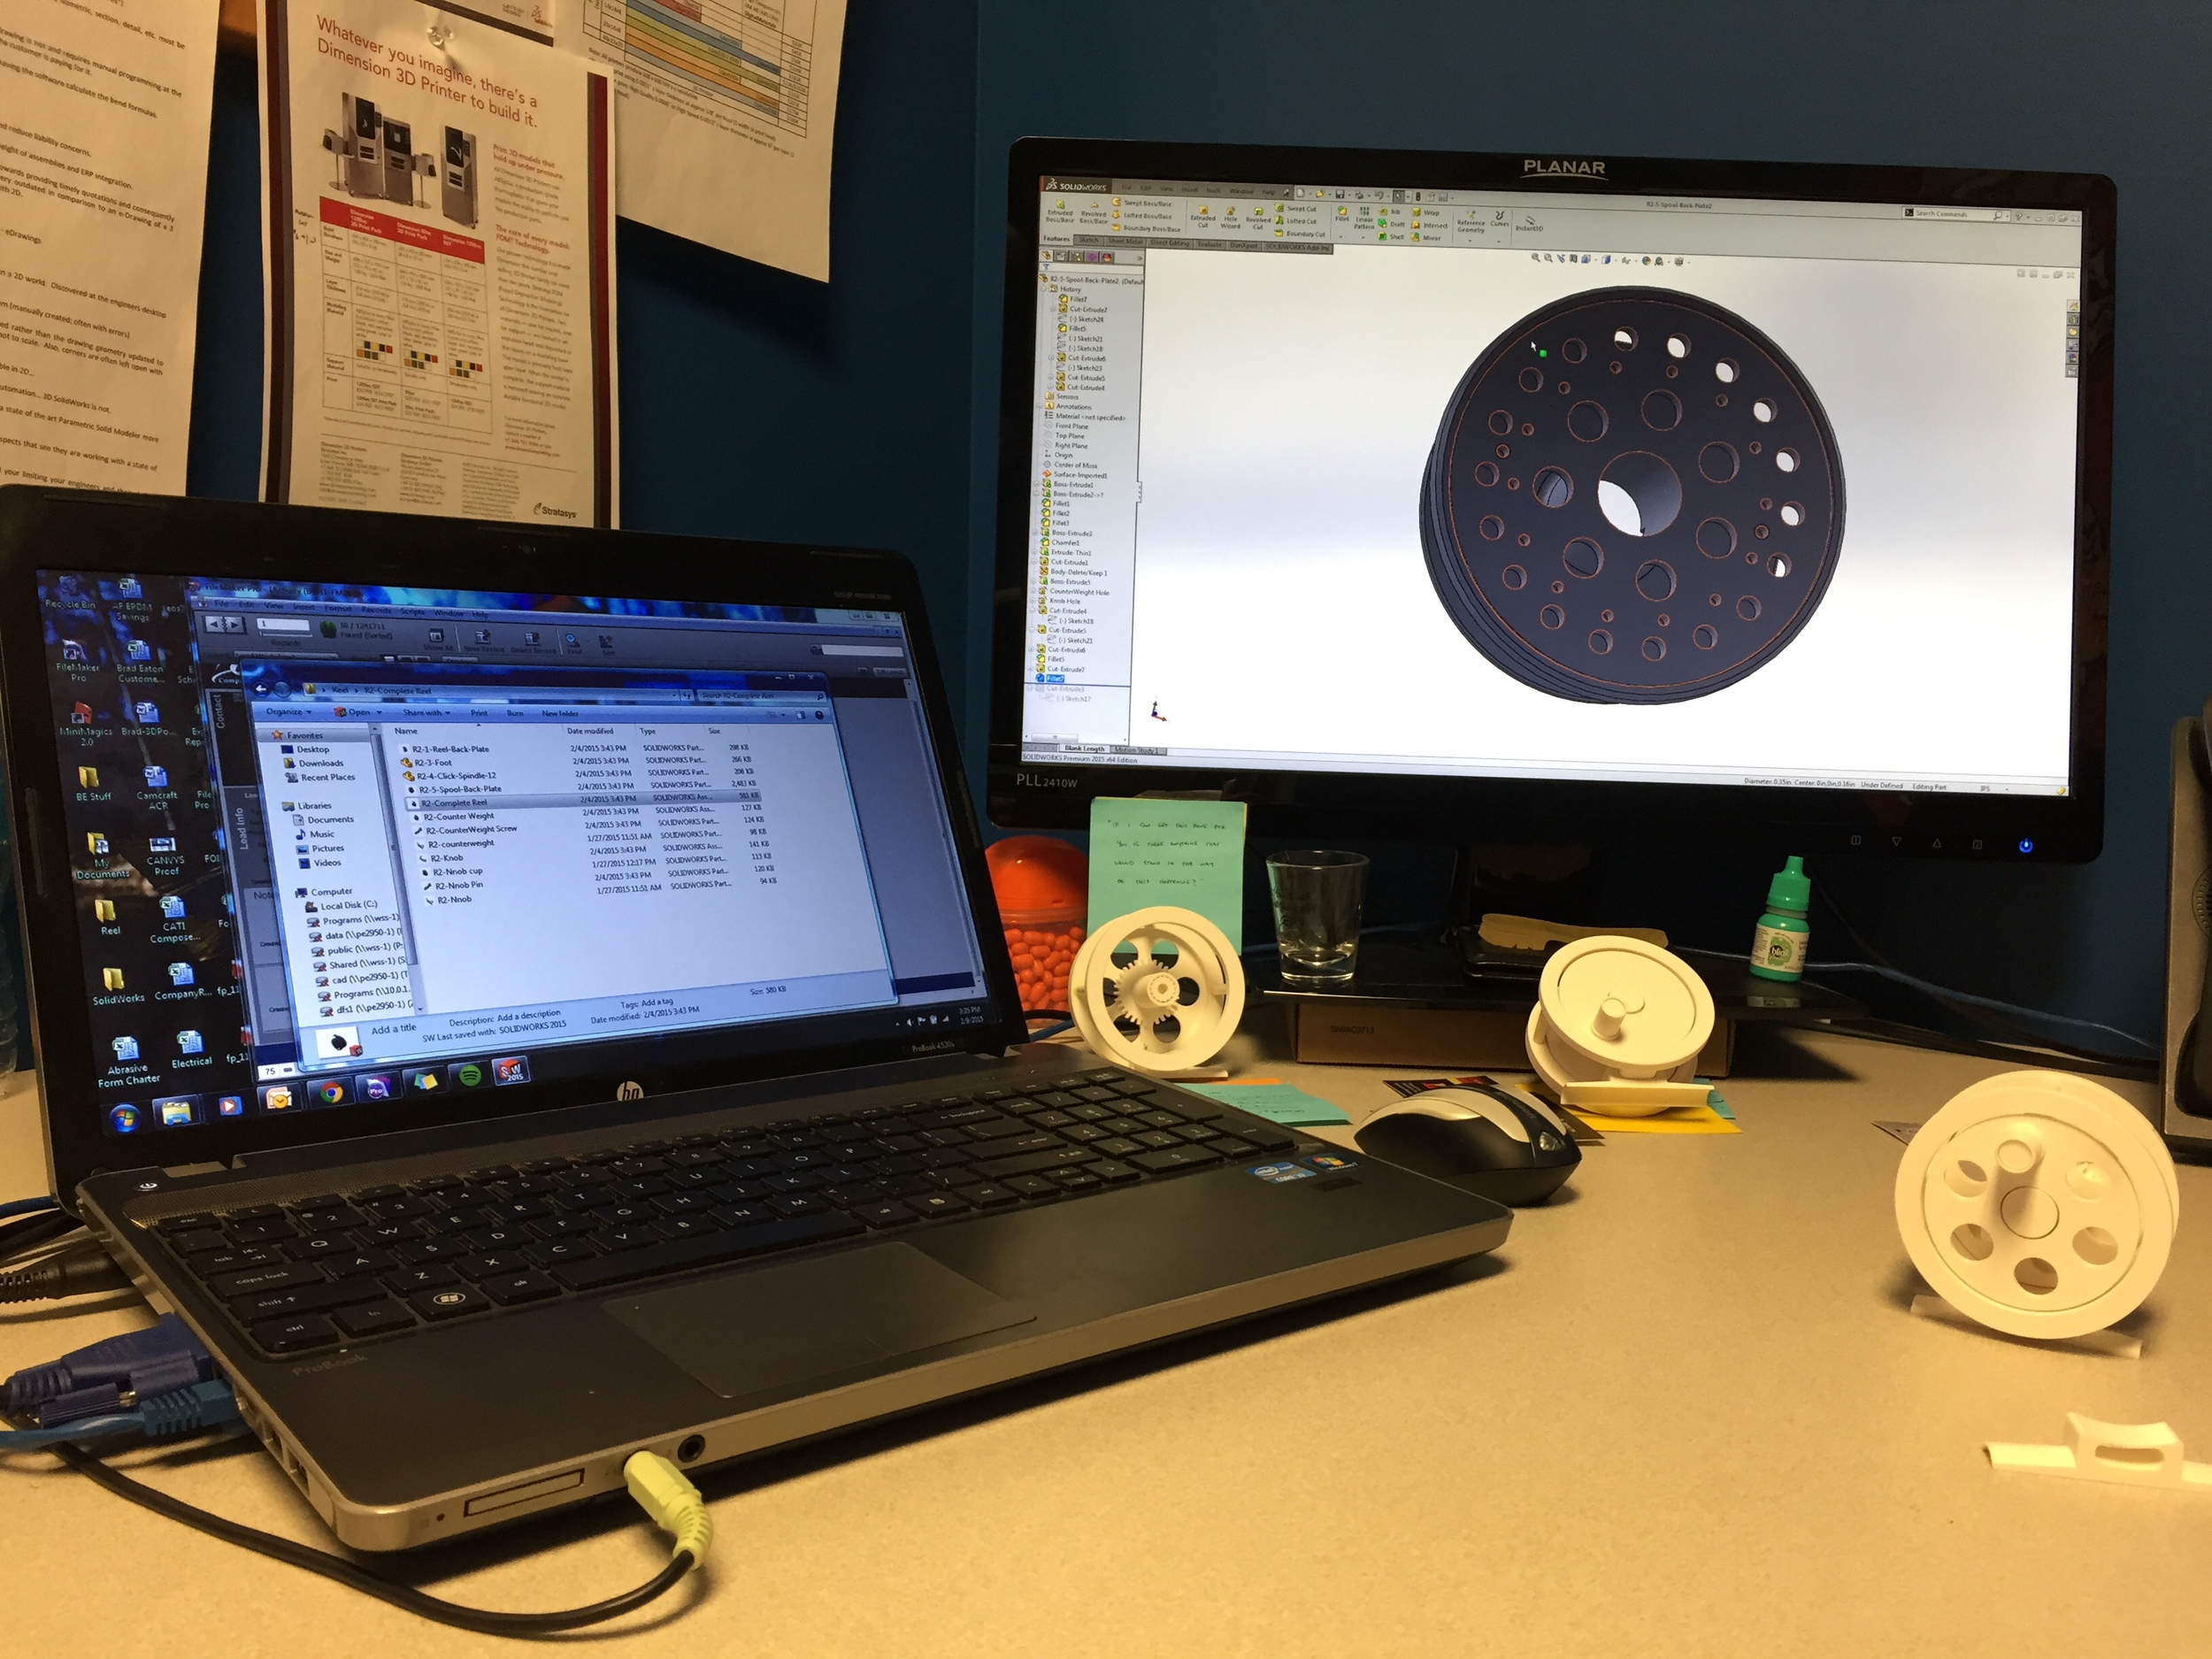
I'm working on fine tuning the design for our next version, which will use a different 3D printing technology and likely mix in some actual machined components. Figuring out a click pawl mechanism and sourcing some components has prolonged the design process a bit. I'm finding that trying to design something around sourced components can be tougher than expected. I hope to have some renderings done soon and will post some more updates as the project progresses. I'm trying to channel a bit of Bogdan with some of the tradition the Hardy's. With the ability to make quick changes, I'd like to have a few ideas to play with.
Keep your eyes peeled for updates and if you have any questions, or want to learn, please don't hesitate to comment or send us a note!