GREENS AND STREAMS BLOG

Teton Gravity Research
I'm a huge fan of DIY and building or creating the things I need and want. Most recently I've fallen head over heels for the idea of having a camping trailer. Nothing huge, just something that will keep me dry on all these rainy nights I seem to be camping lately. It's a rough year when over 75% of your camping trips involve rain or some type of precipitation. And it's seasons like this, that make a man want a bit more than a thin sheet of nylon between himself and the elements.
Teton Gravity Research recently featured a write up on Dan Gibeau and his wife Brittany, and their tiny house. Dan, being a cinematographer for TGR, spends a lot of his time in the backcountry and out and about chasing powder. Add to that the cost of renting or owning a home in a small ski town like Jackson Hole, and it quickly becomes apparent that lodging can present unique challenges.
Enter the tiny house movement, and the ingenuity of someone with a plan. Follow along their journey on how and why they built this little treasure.

If you're looking for more on building your own tiny house, or you're like me and a tear drop trailer makes more sense, check out some of the build projects on the Tear Drops and Tiny Travel Trailers website and forums. There's some serious builders out there and the stuff they're kicking out is impressive.
DIY Fly Boxes - Meat Box
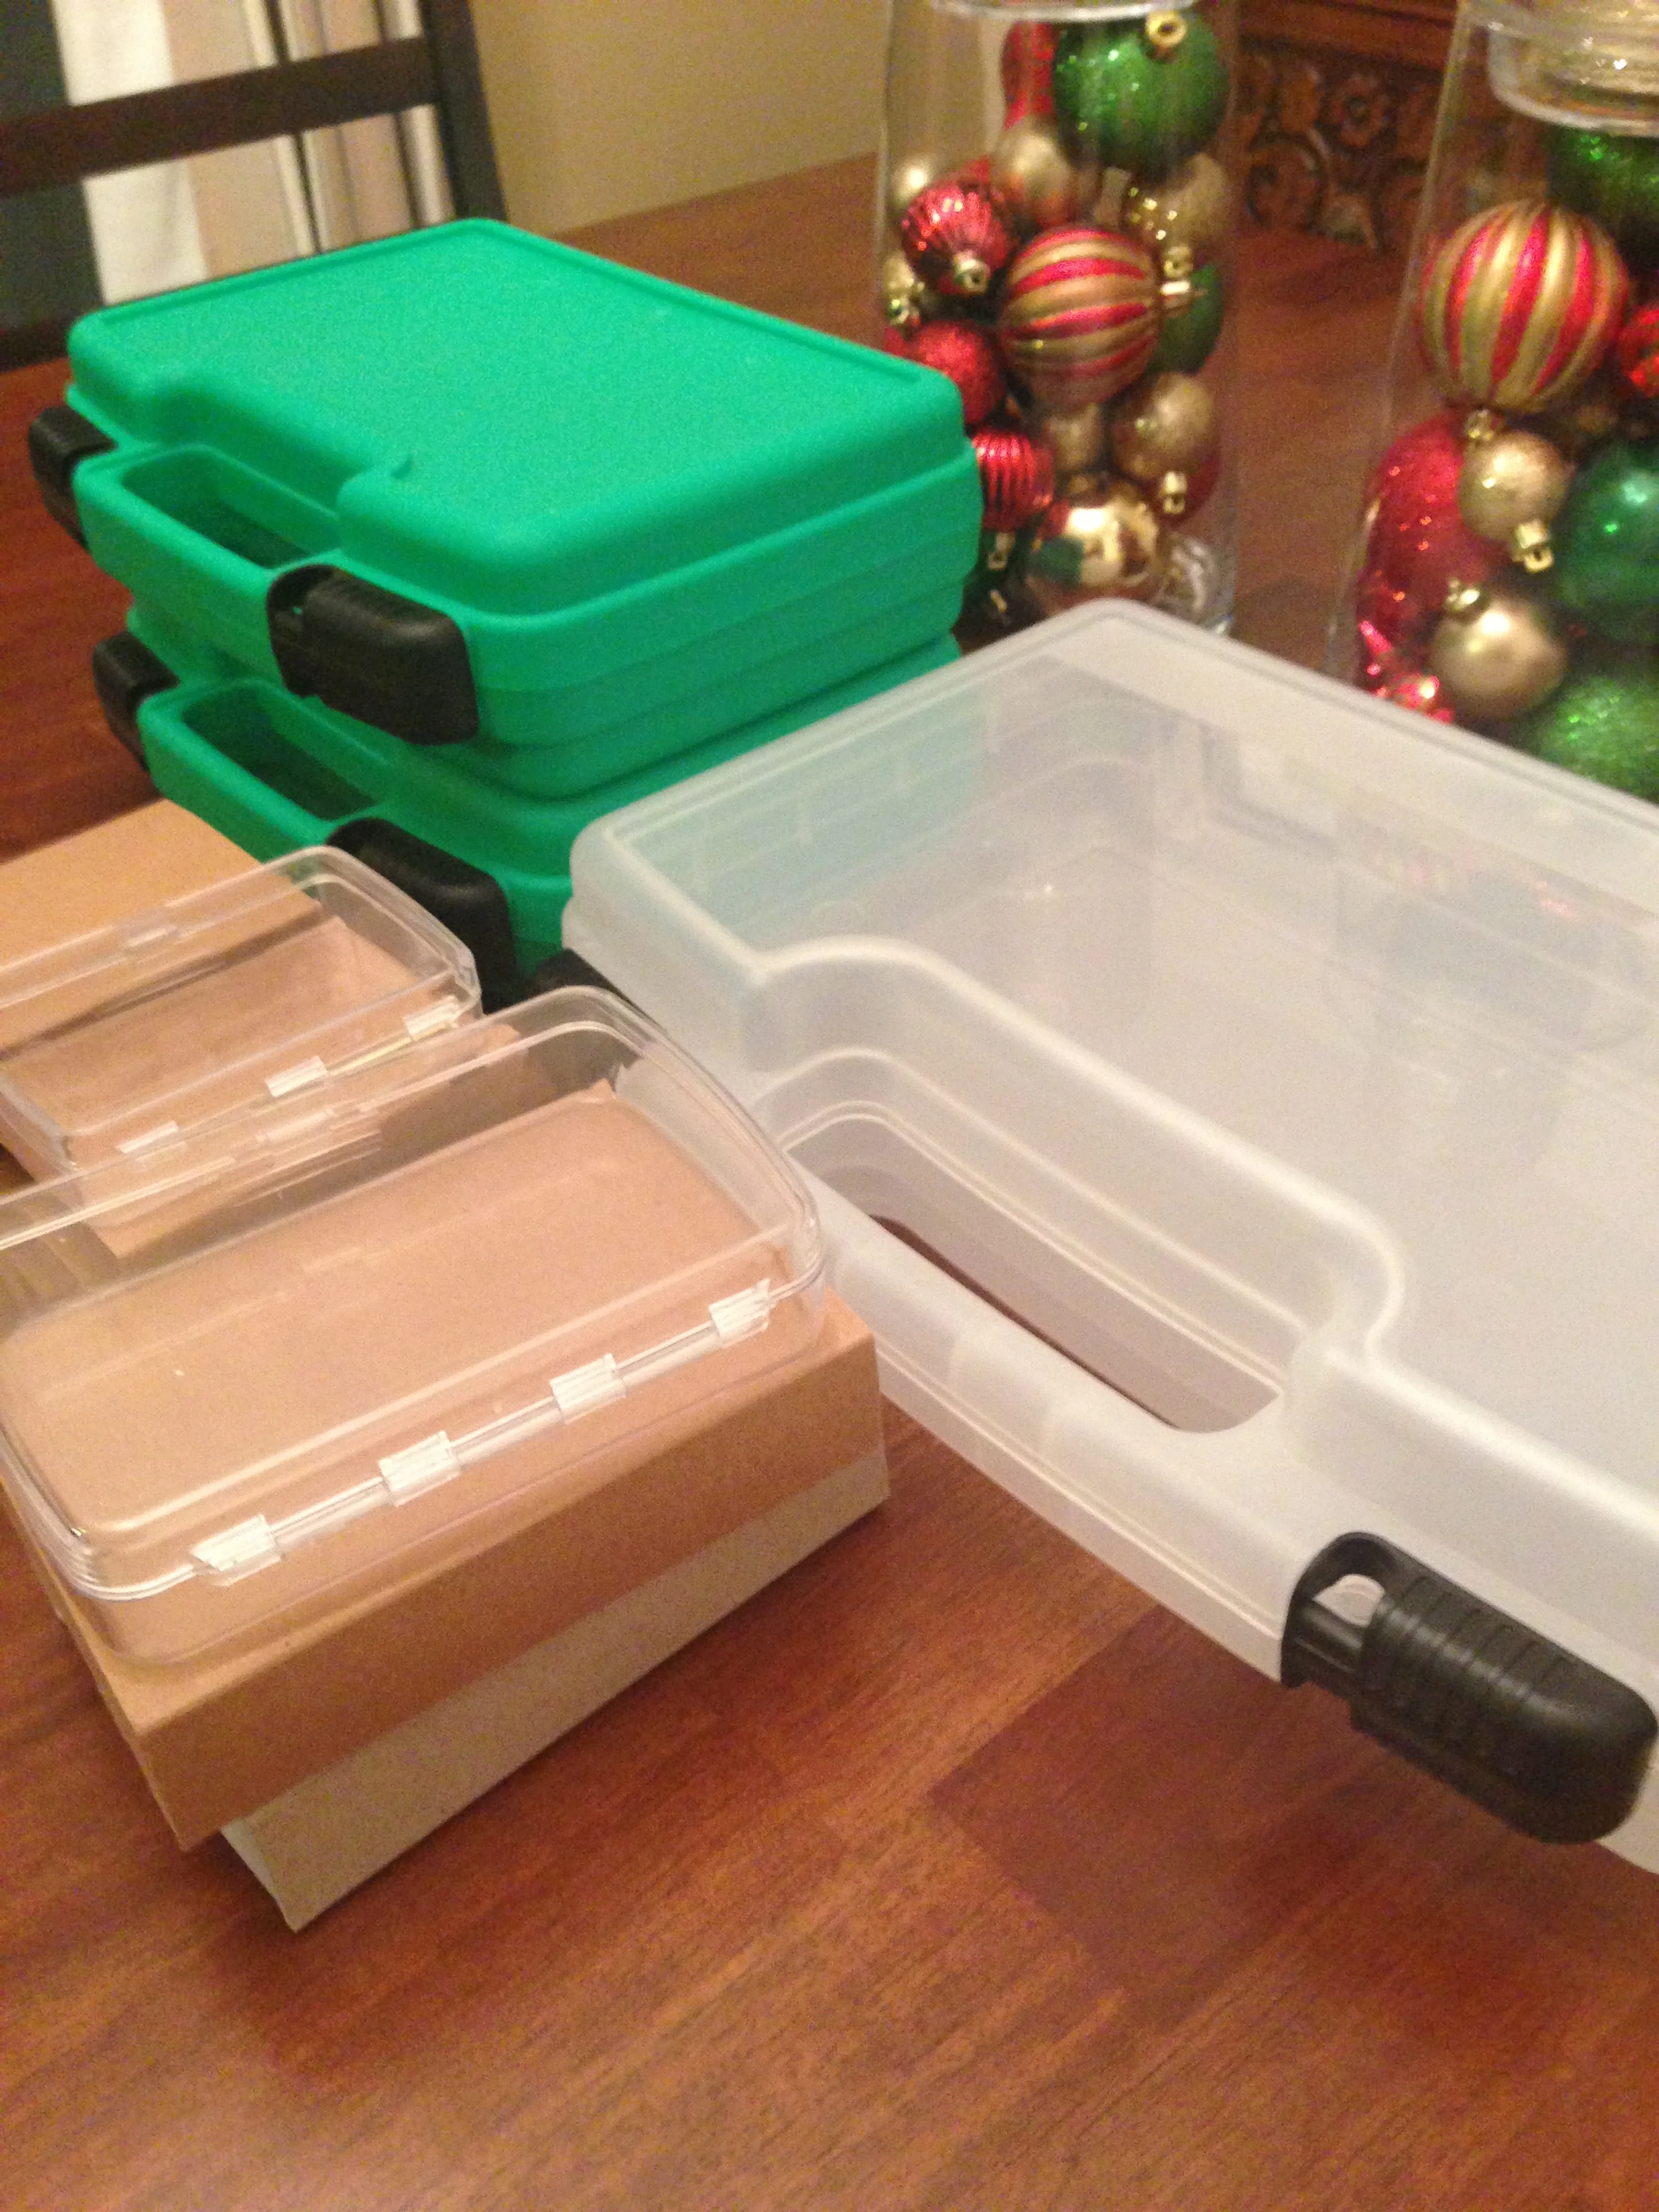
In a follow up post to our last DIY, I wanted to share a larger, streamer box, made for your monster flies. This is another easy build, using 6mm foam and a plastic case. I used a single layer of the 6mm foam, but in the past I've also used two. Having the extra thickness doesn't hurt and gives you a little room for error.
I love these boxes and have built them in a variety of sizes. Through the same company as before, Flambeau, you can get the same boxes you might find at Michael's craft store under the Art Bin name. You're just cutting out the middle man ordering them from the web, and avoiding having their logo burned in the top.
You can find the different sizes on the Flambeau webpage. See here: FLAMBEAU TRADESMAN CASES. Also be sure to check out their Clearance page. The green case used in this DIY is the 10 1/2 in case and cost $1.84. As of publication, there are still some available.
You can get these cases with and without egg shell foam through Flambeau. With the foam they make great fly tying travel cases for just a few bucks. The foam keeps your materials from moving around and it'll hold most fly bases I've encountered.
I figure cost out the door is around between $4 and $6 depending on the extra layer of foam and size of choice. Beats the heck out of $35 and a trip to the fly shop.

For this you'll need two (or four if you want thicker pad) sheets of 6mm foam, Flambeau case (this is the 10 1/2 in), a razor cutter or Exacto knife, a straight edge, and spray adhesive.

Using a hard surface, use the case's edge to create an indentation in the foam.
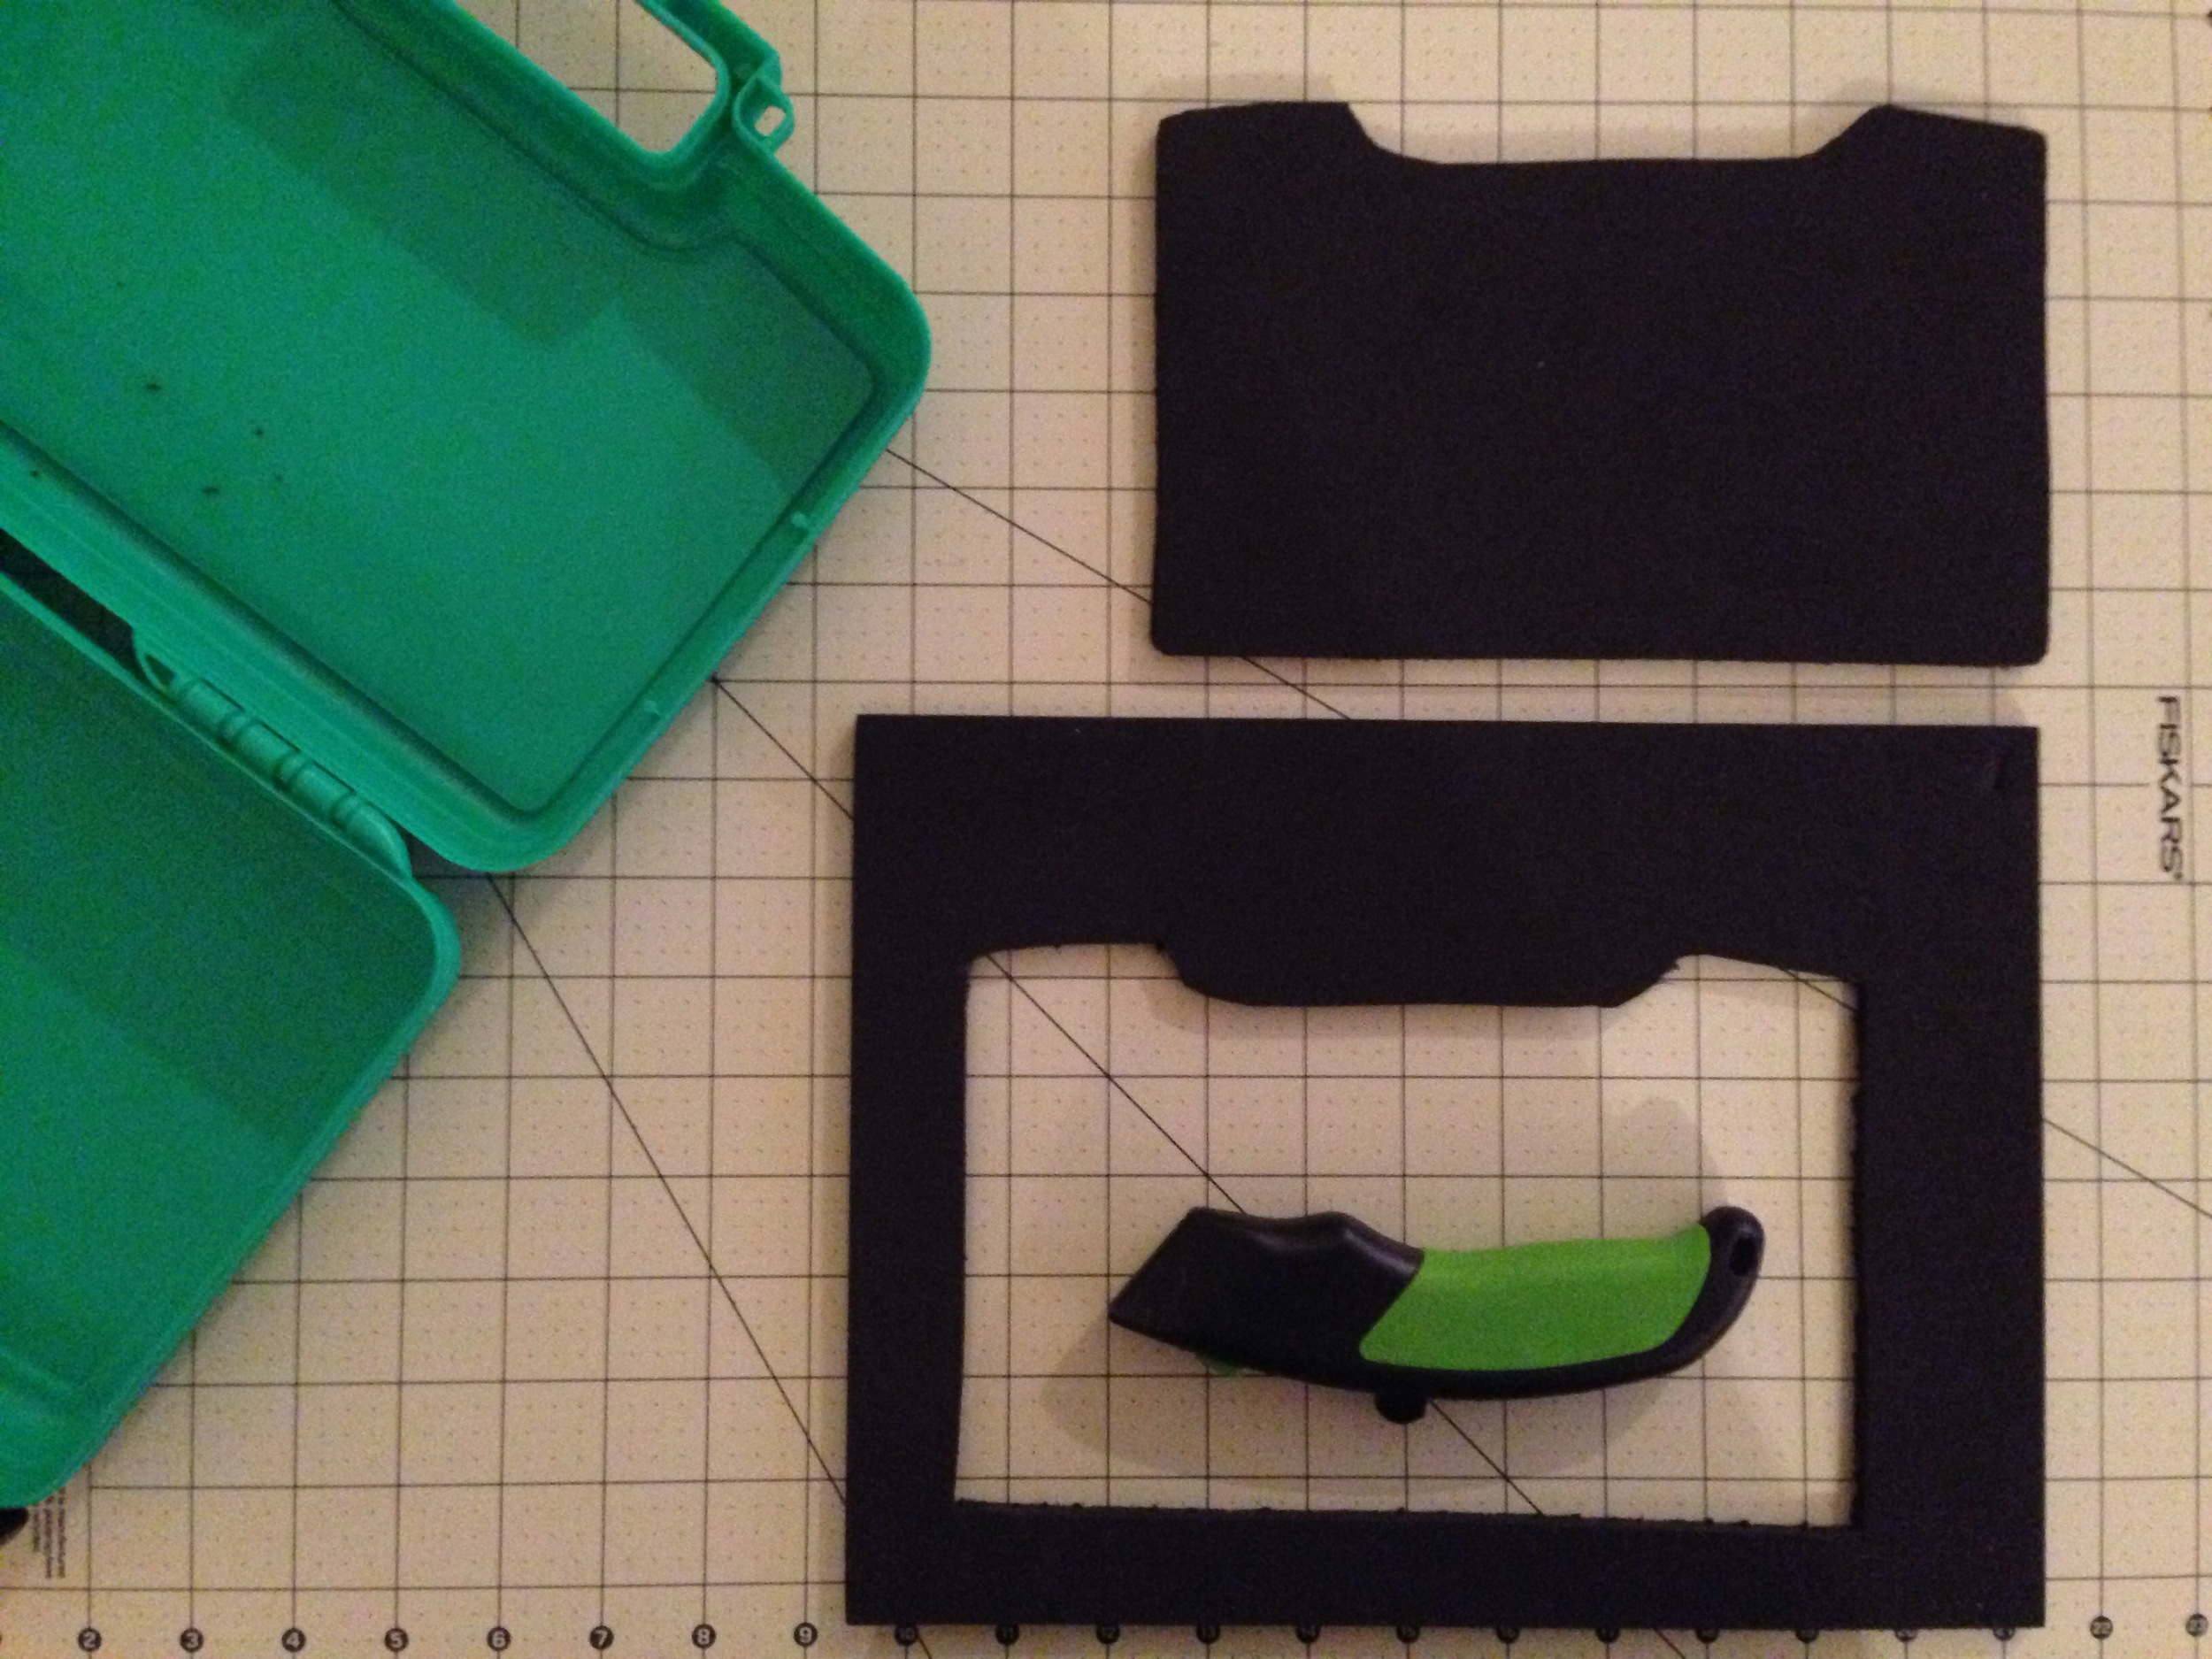
Use the indentation and trace around to create your case panels.

After cutting, give it a dry fit and any necessary trimming.

Grab that Exacto knife and using the straight edge, cut your slit about 3/4 of the way through the foam. Be careful not to cut all the way through. Any cuts through will allow your adhesive to leak through in later steps.

Give it a final dry fit and decide which fits each side best.

Be sure to have your spray adhesive the same temperature as your foam to eliminate your foam curling. Spray all the way to the edges and place in the appropriate side.
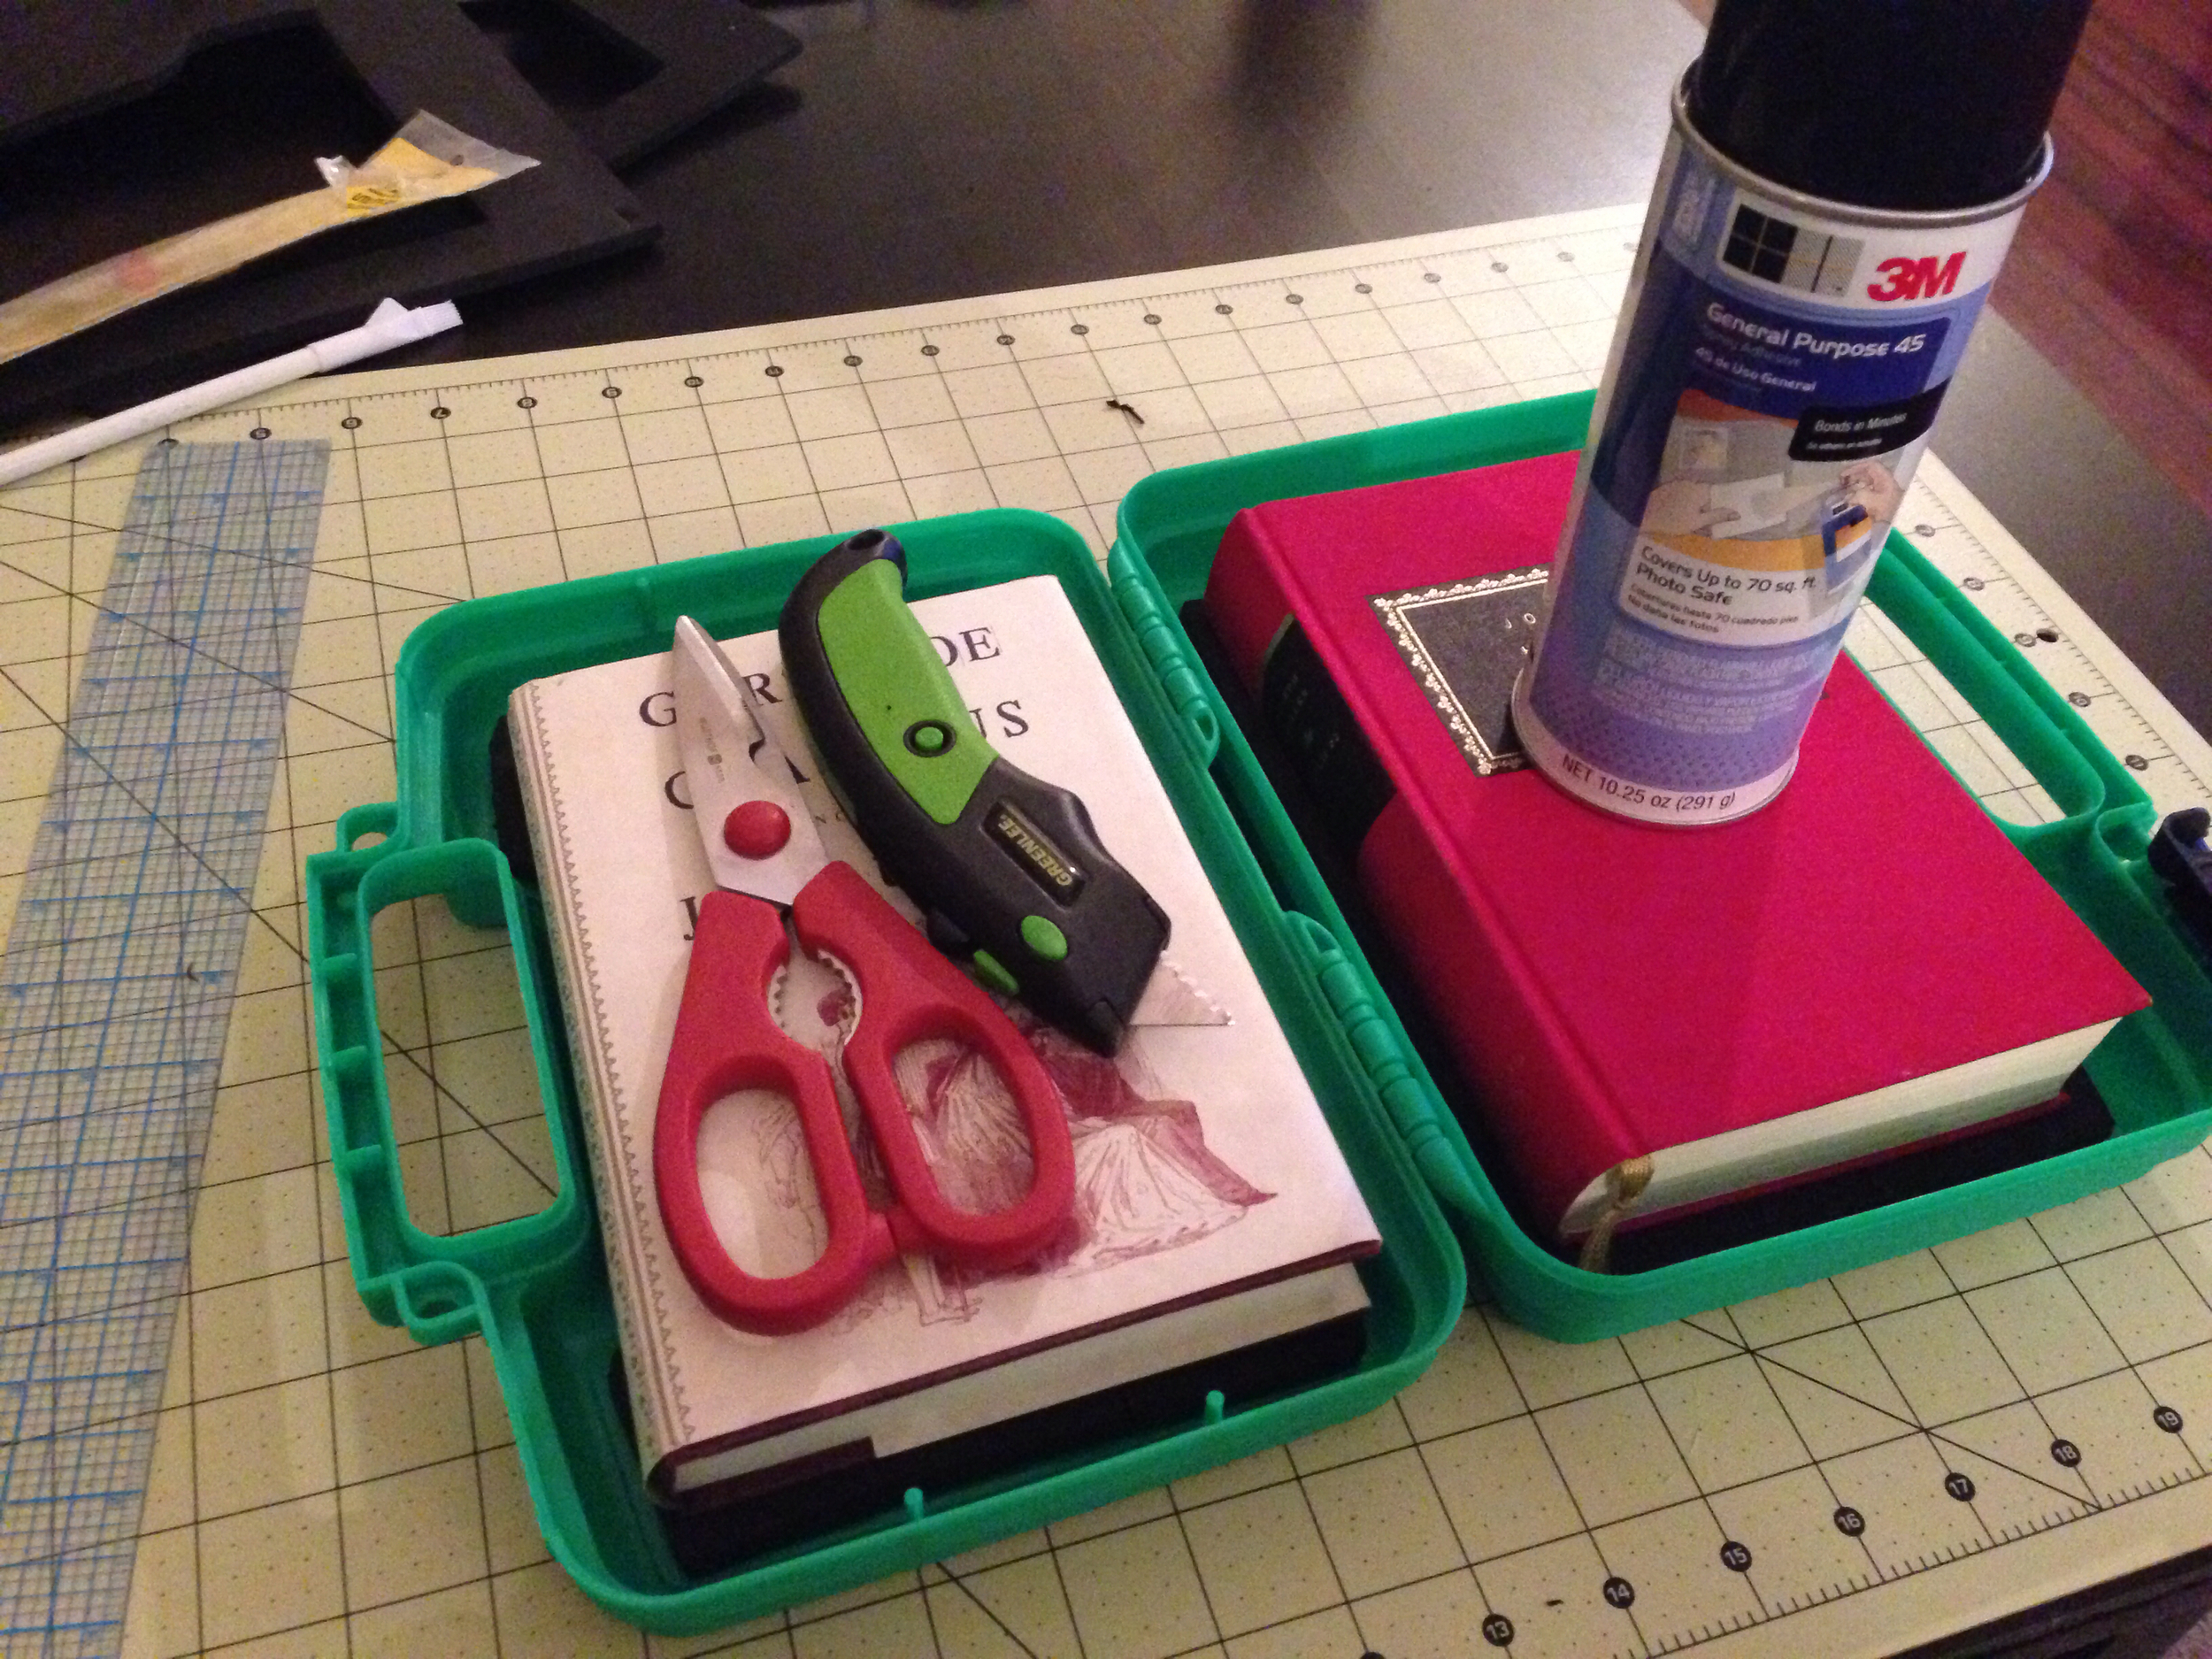
Use weight if necessary to ensure the adhesive is dry.
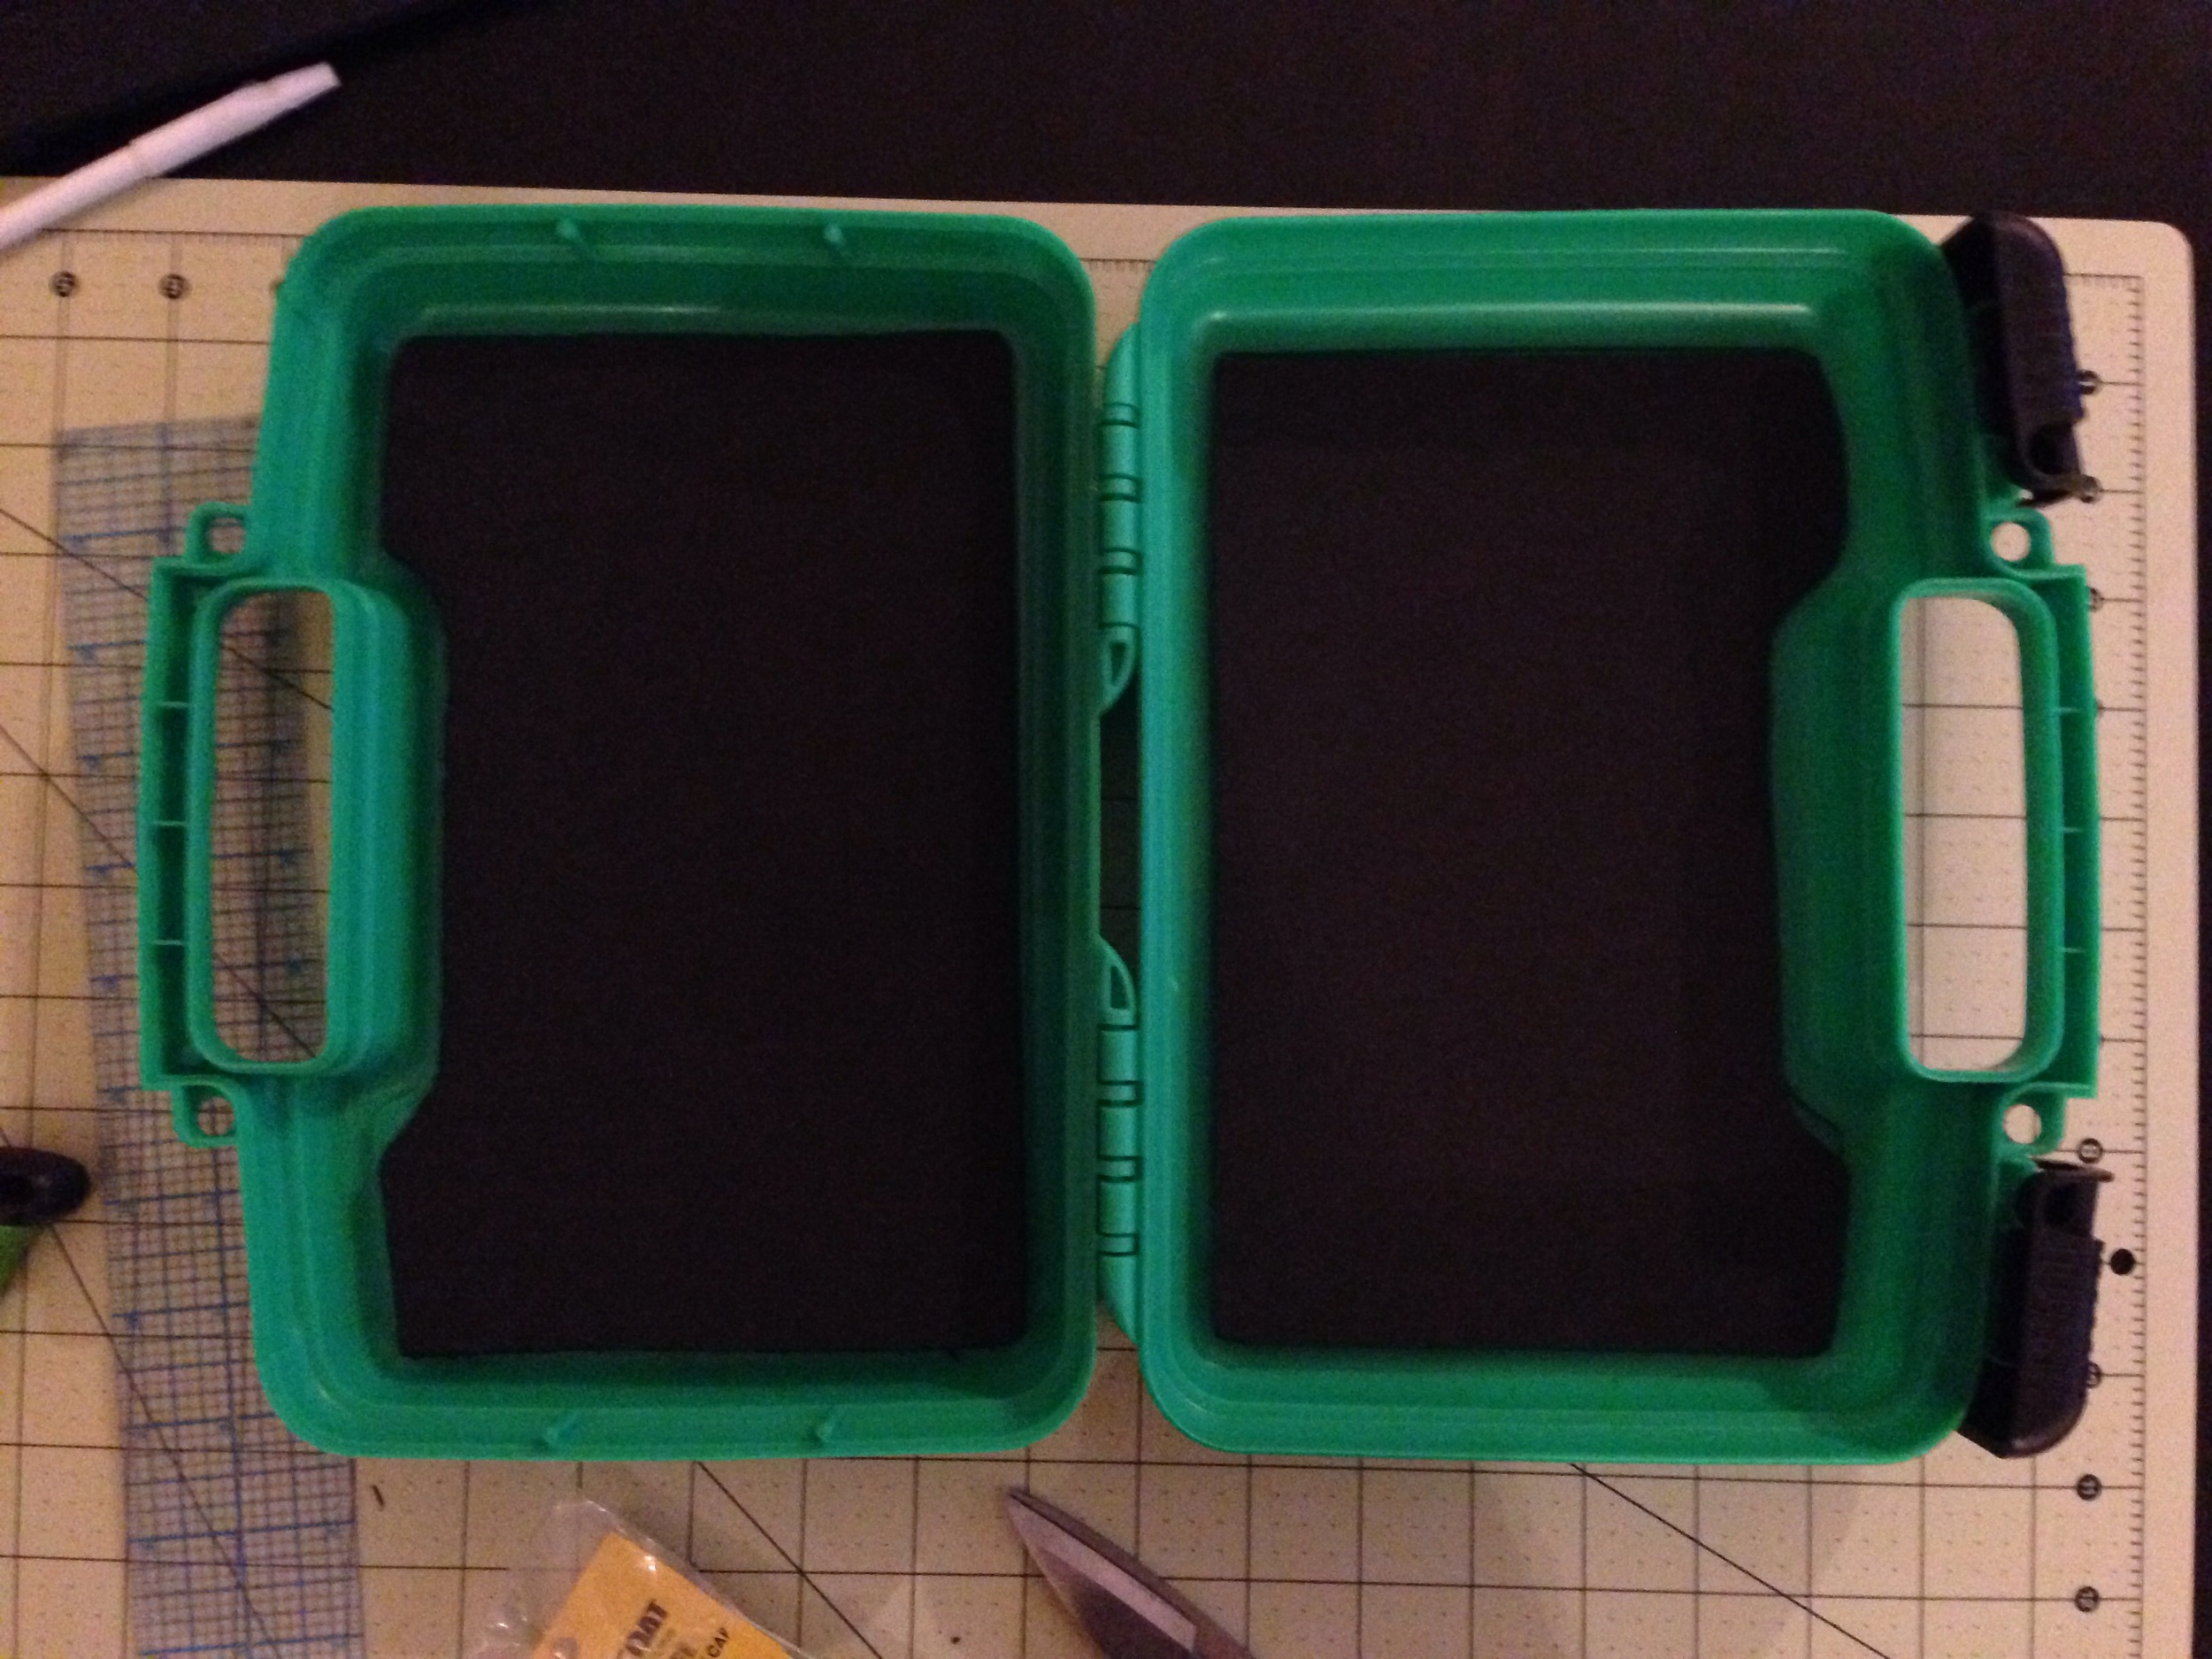
Final product, ready for some articulated goodness. You can also add another foam surface on the front/face of the case by cutting out an extra panel and using the spray adhesive as above.
Outdoor Research - Aberration
Whenever I see a link to a short film about photography and the outdoors, you can figure I'm going to make time to check it out, or just drop what I'm doing and dive in. This short film happens to fall in to the latter.
When I happened on the Outdoor Research website and read the write up on Aberration, I found a few minutes and dove in. The way Forest Woodward brings you in to the climbing, how he tells the story of his friendship with Graham Zimmerman, and the results he produces are awesome. As a photographer that loves being in and working in the outdoors, it's cool to see guys getting out and getting it done.
